food

AQUIEM: Coffee Brewed Right

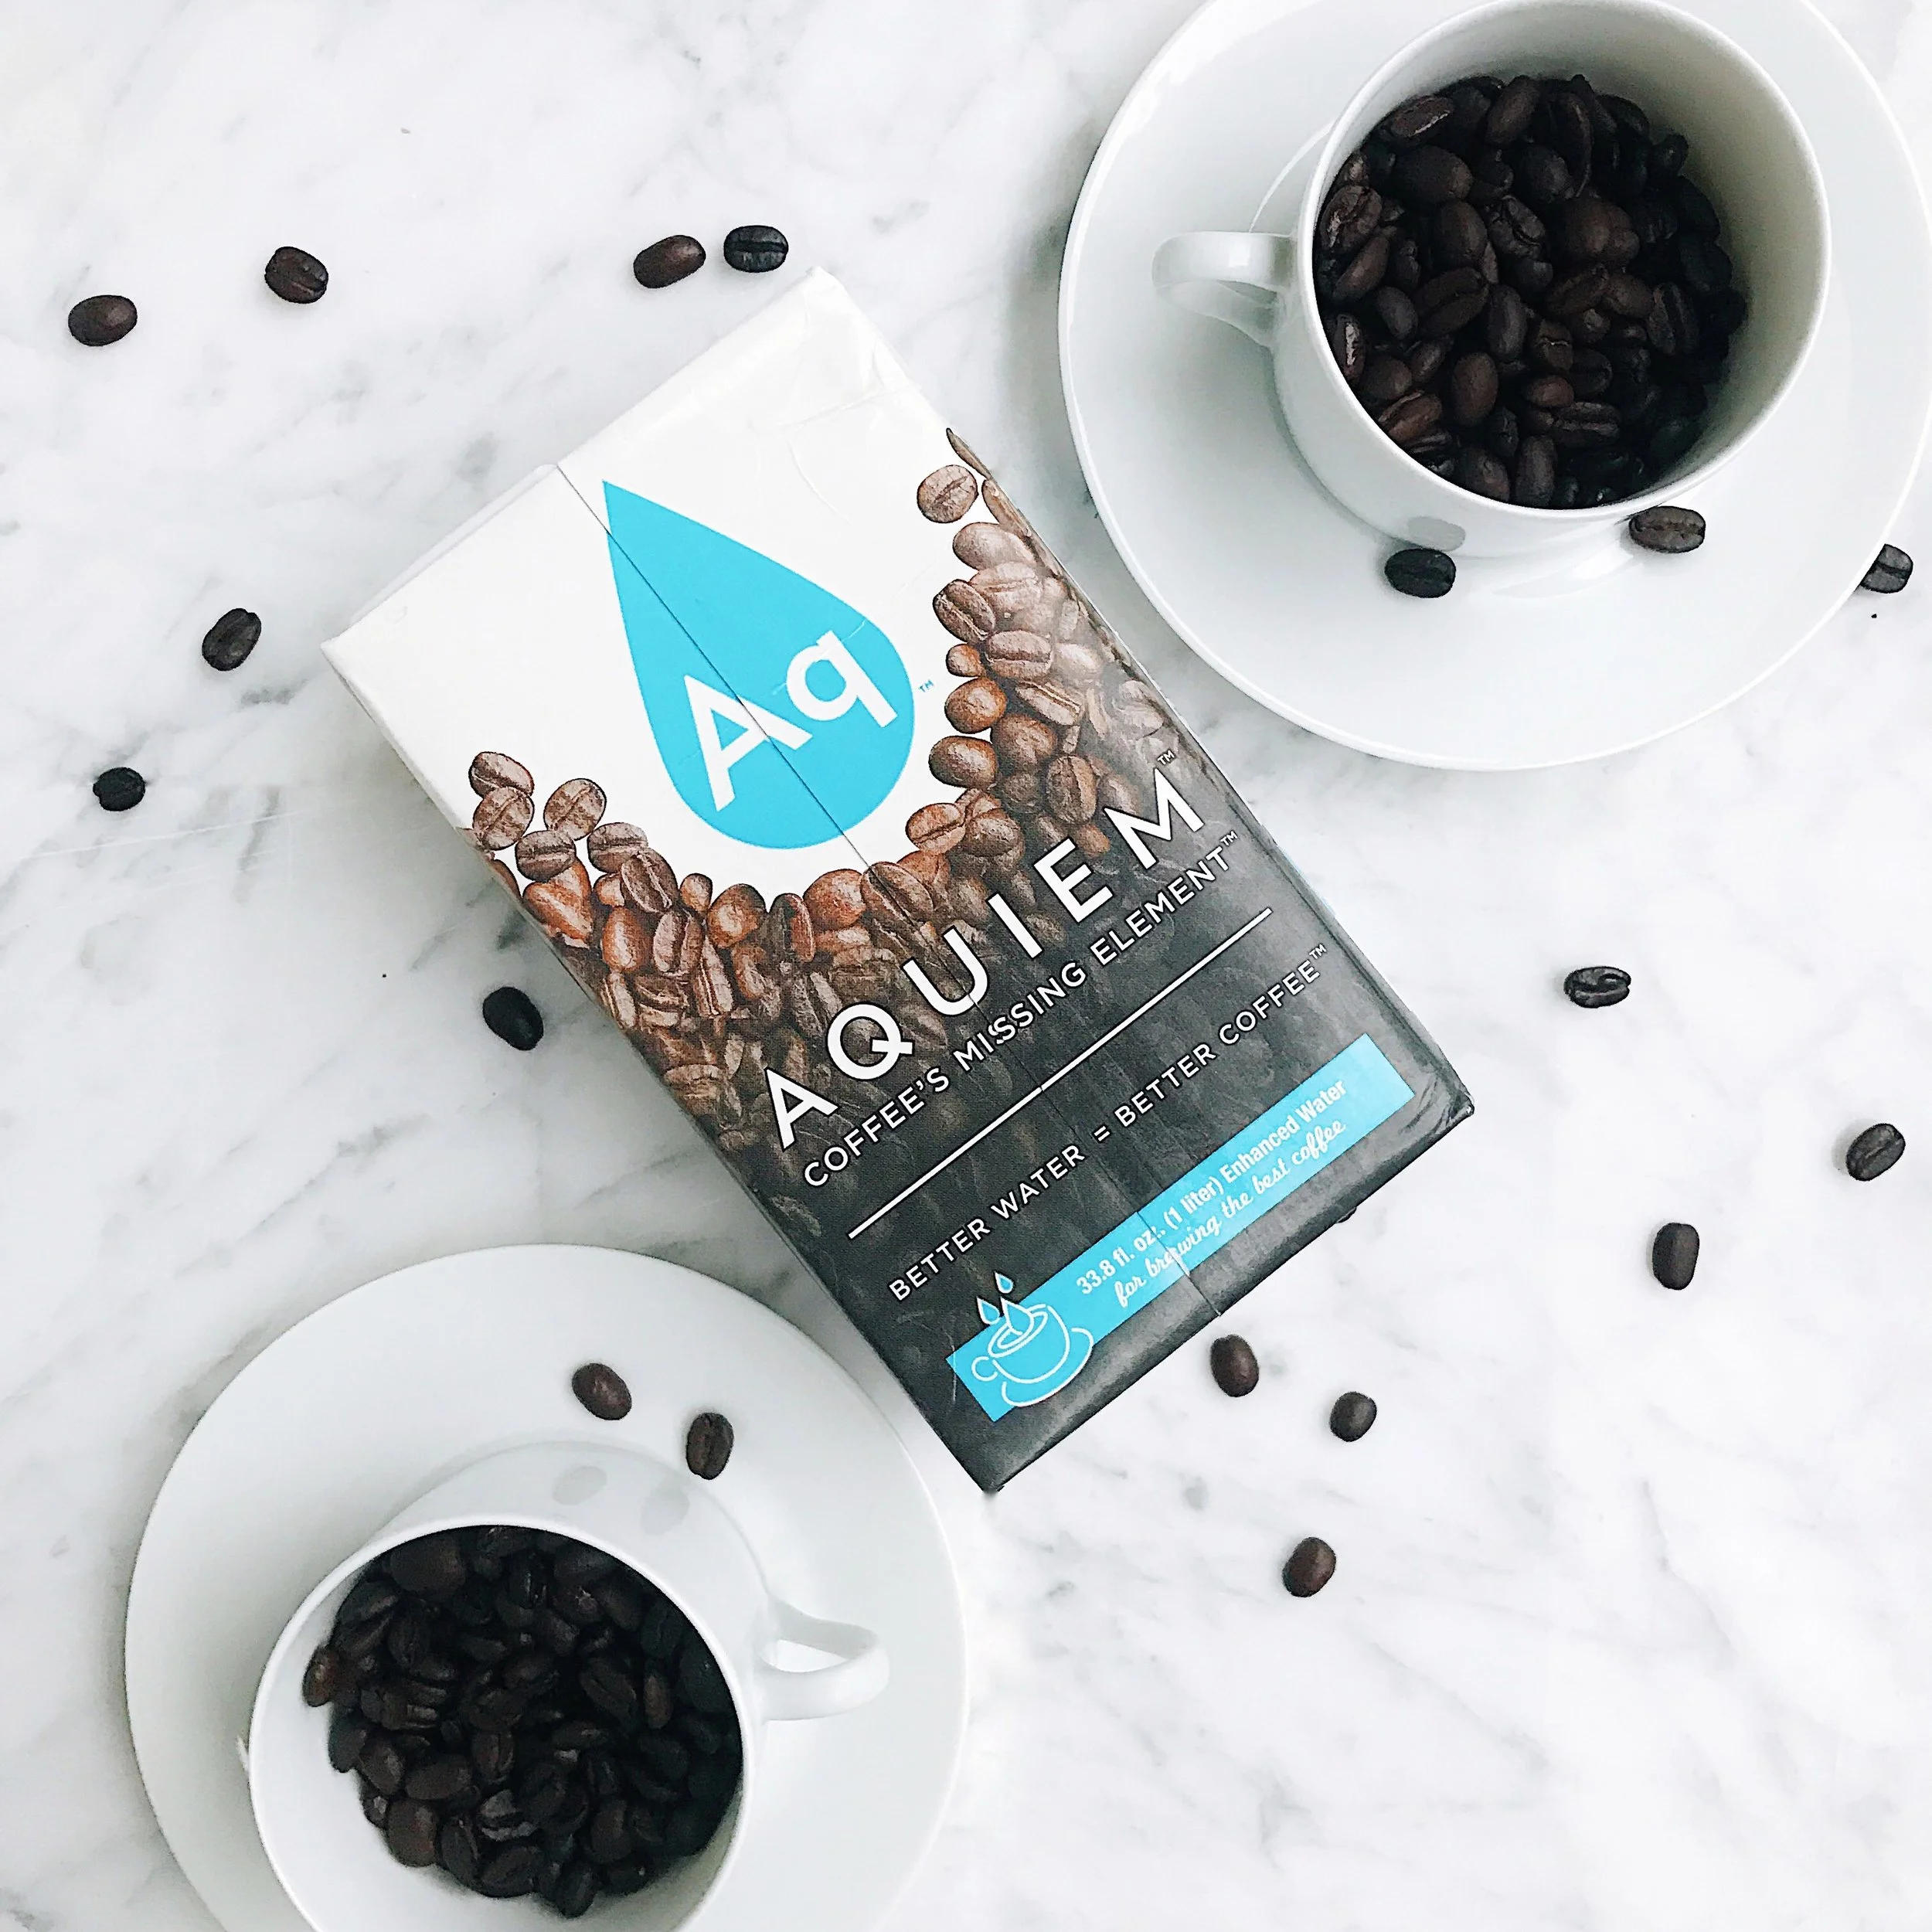
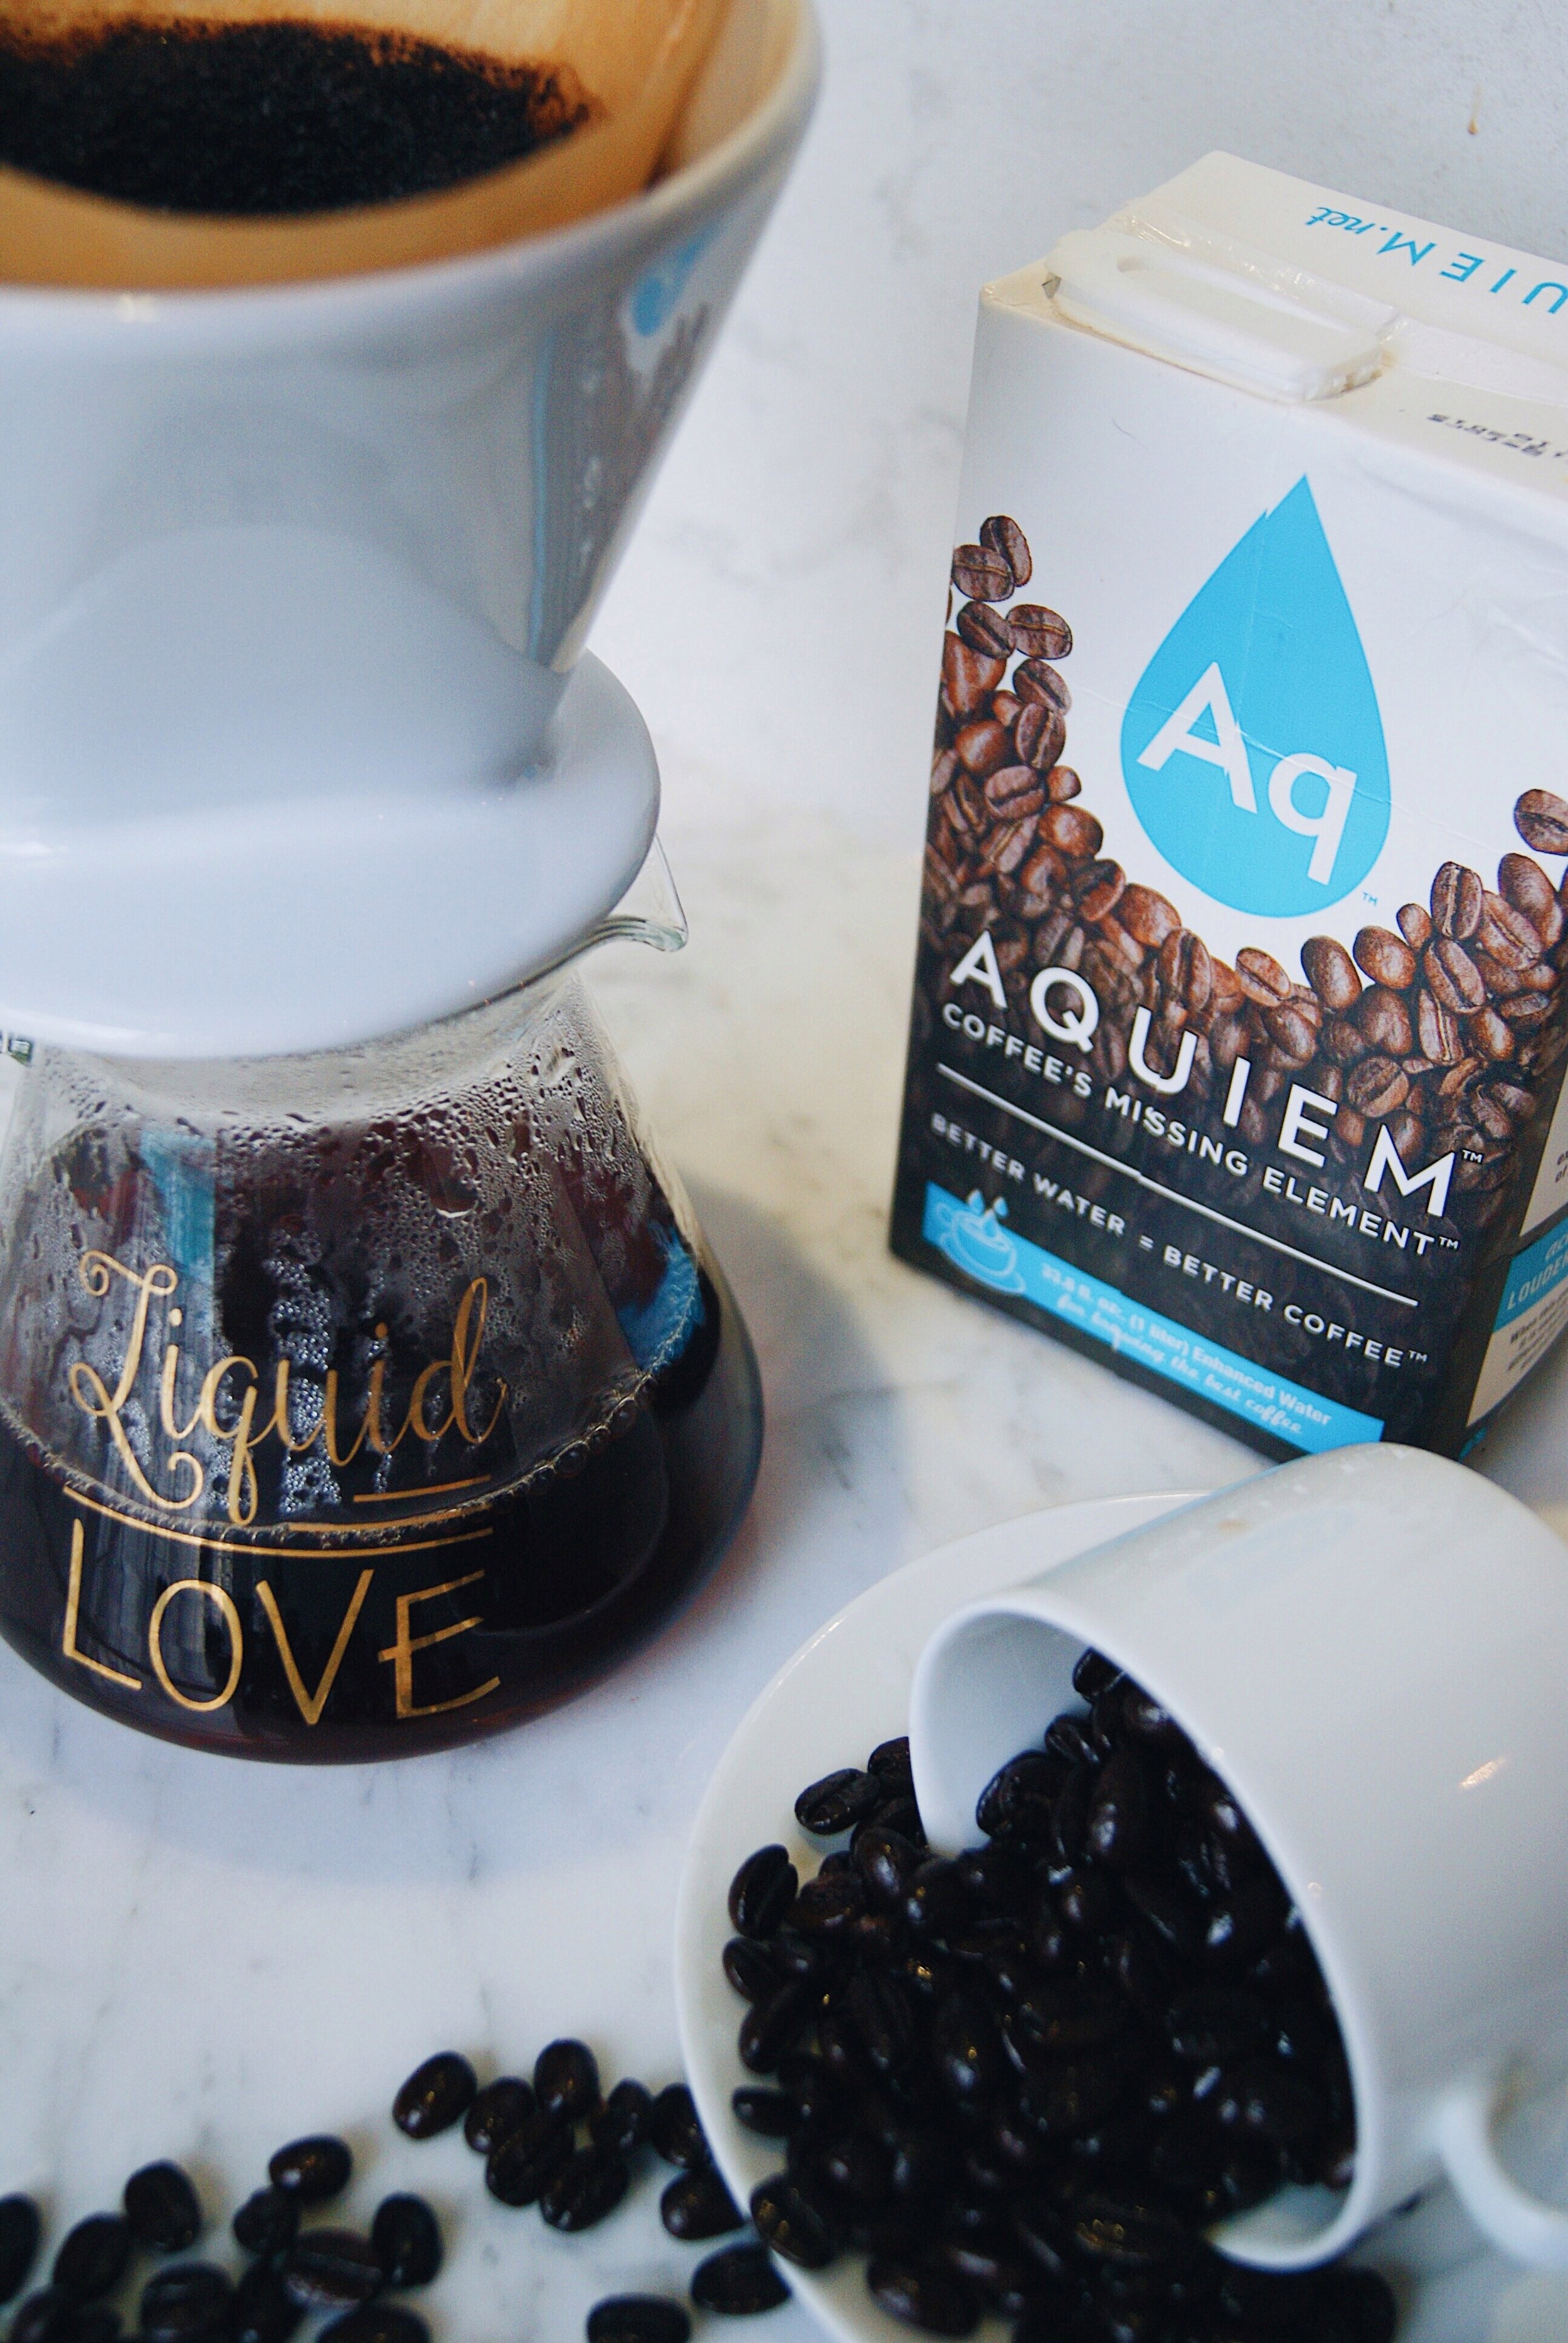
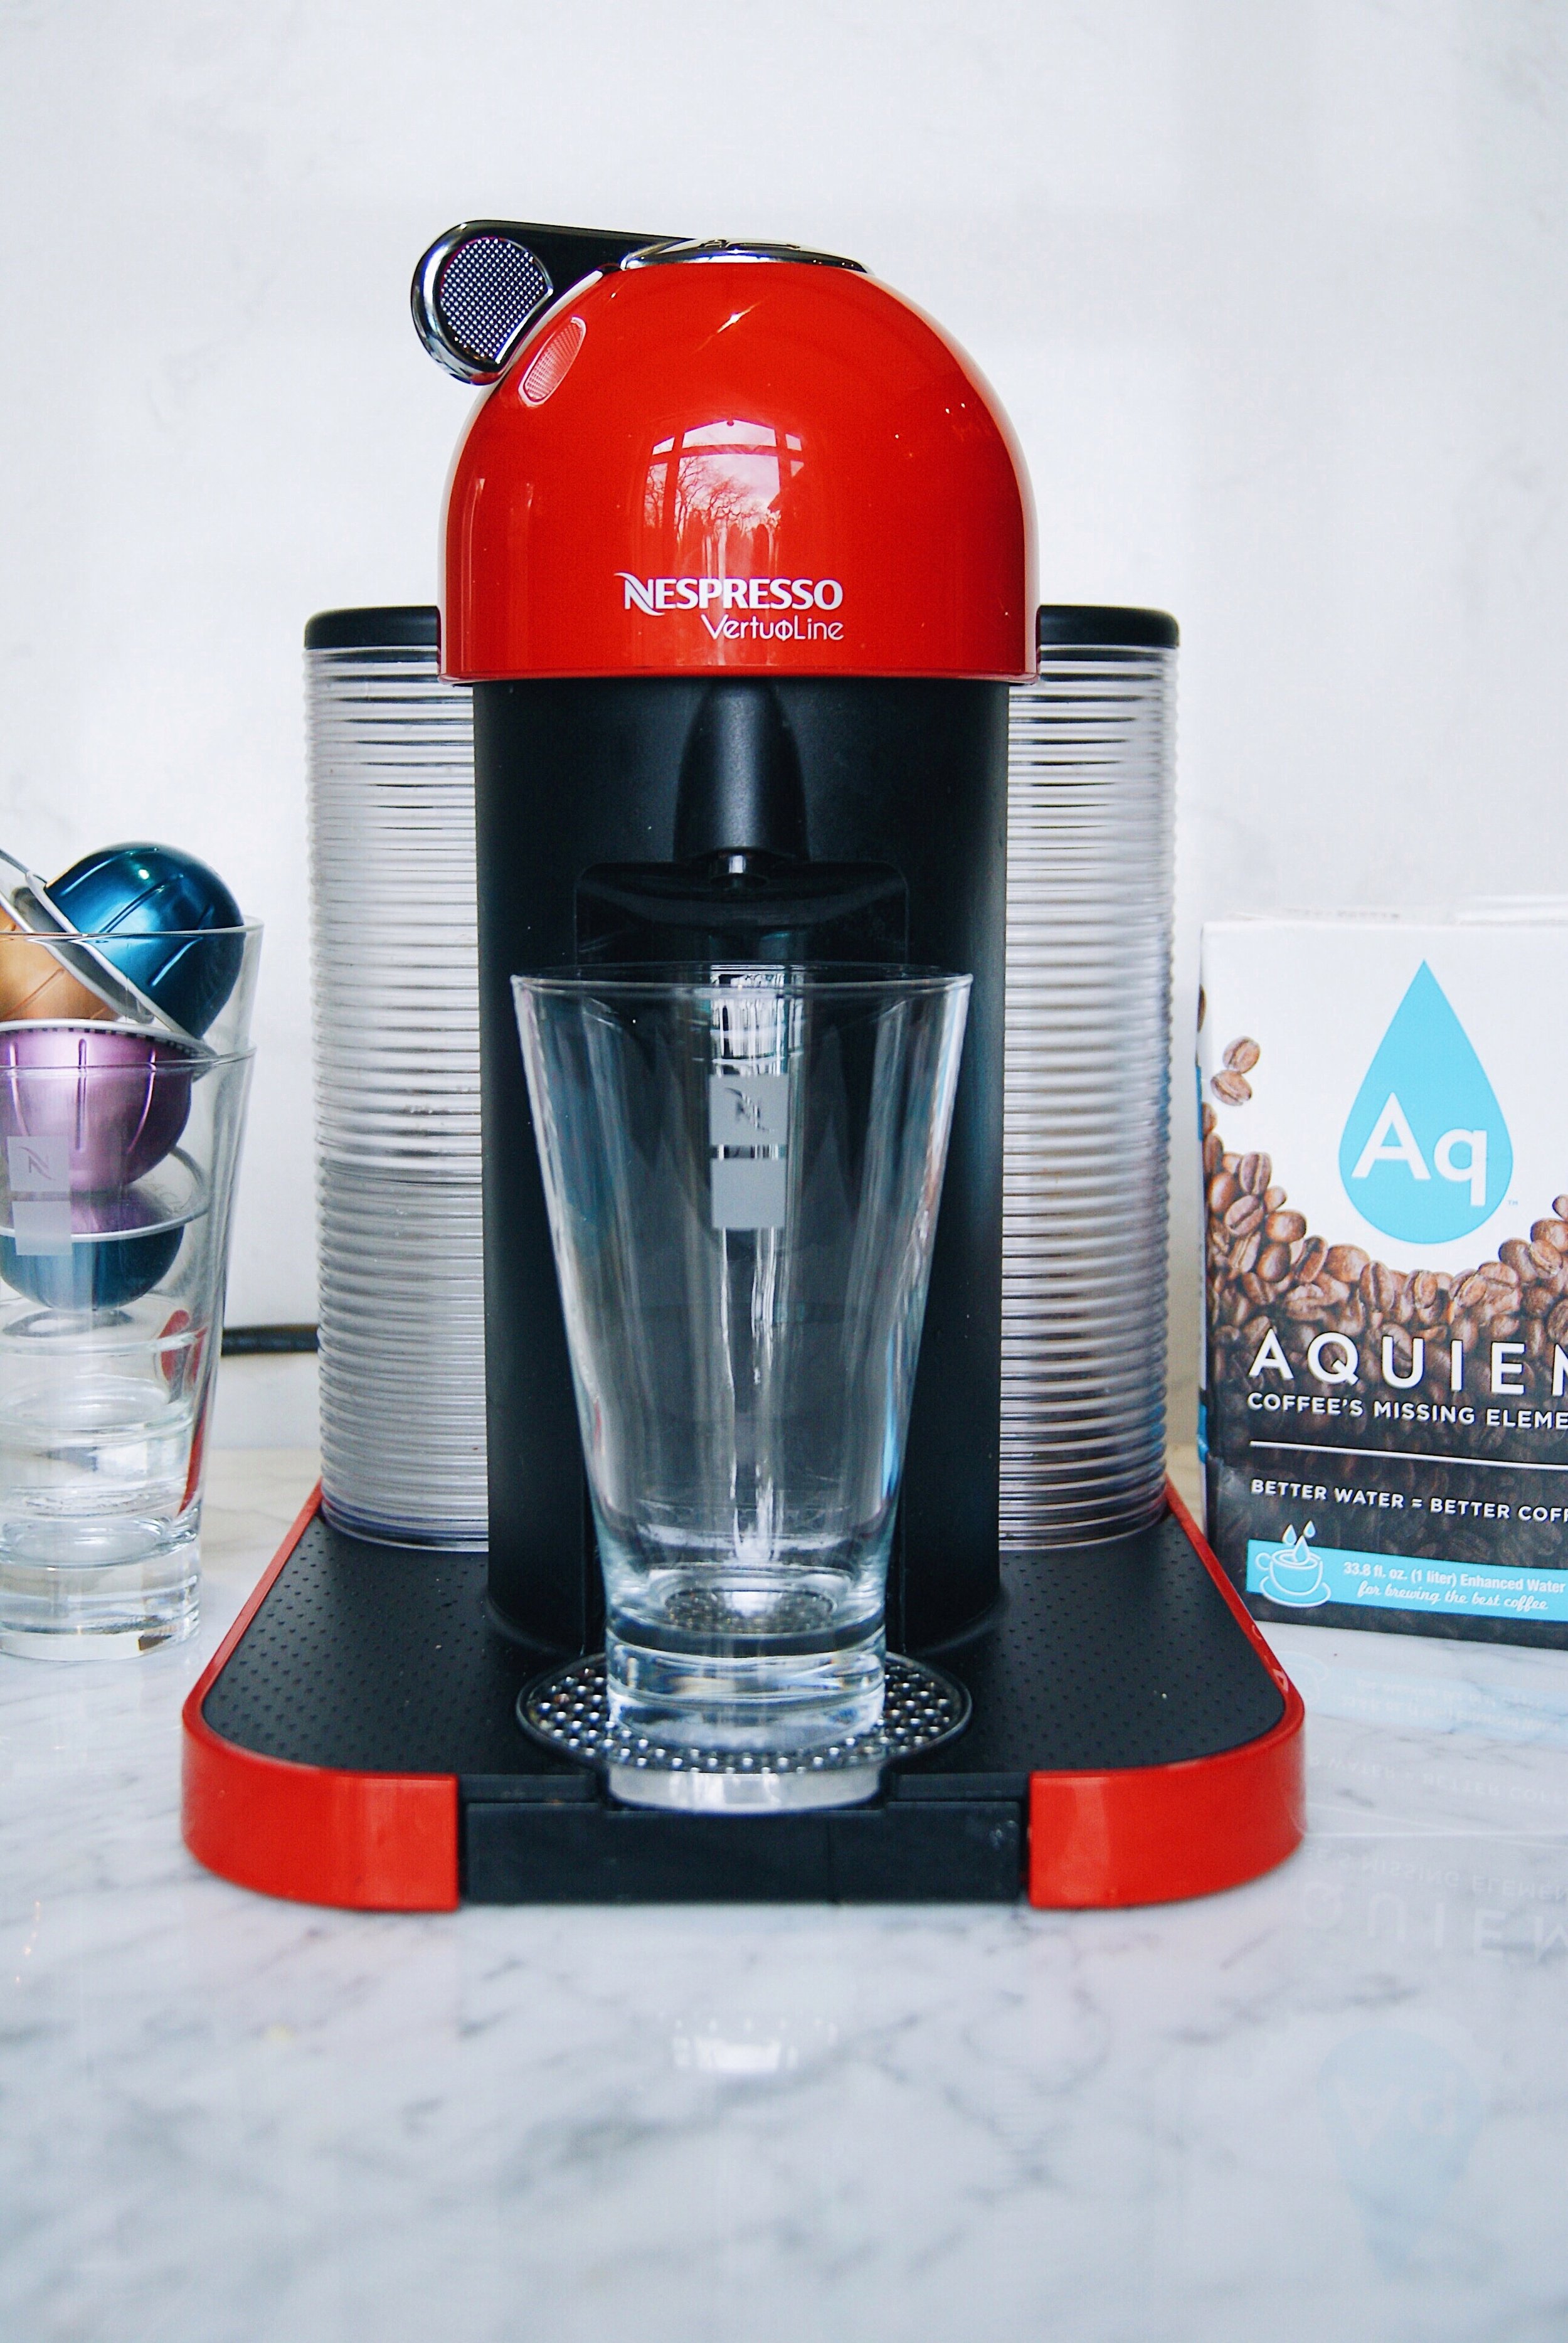
We love coffee as much as the next person, and enjoy every sip of our morning cup of joe. For years, we have been using Nespresso coffee and their machines and love the simplicity of getting a great cup with little effort. Nespresso's coffee beans are great quality so when we recently discovered AQUIEM we were interested in testing it out with our machine.

AQUIEM sells boxed water to use when making coffee. Their water is purified specifically to include the minerals that enhance flavor and exclude all the bad stuff - like chlorine, zinc, copper, and acids you find in regular tap water. This water is meant to enhance coffee's taste and aroma. Hmmm... It sounded sort of ridiculous when we first read about it, how different can your coffee taste just by changing what water you use to brew it?! 

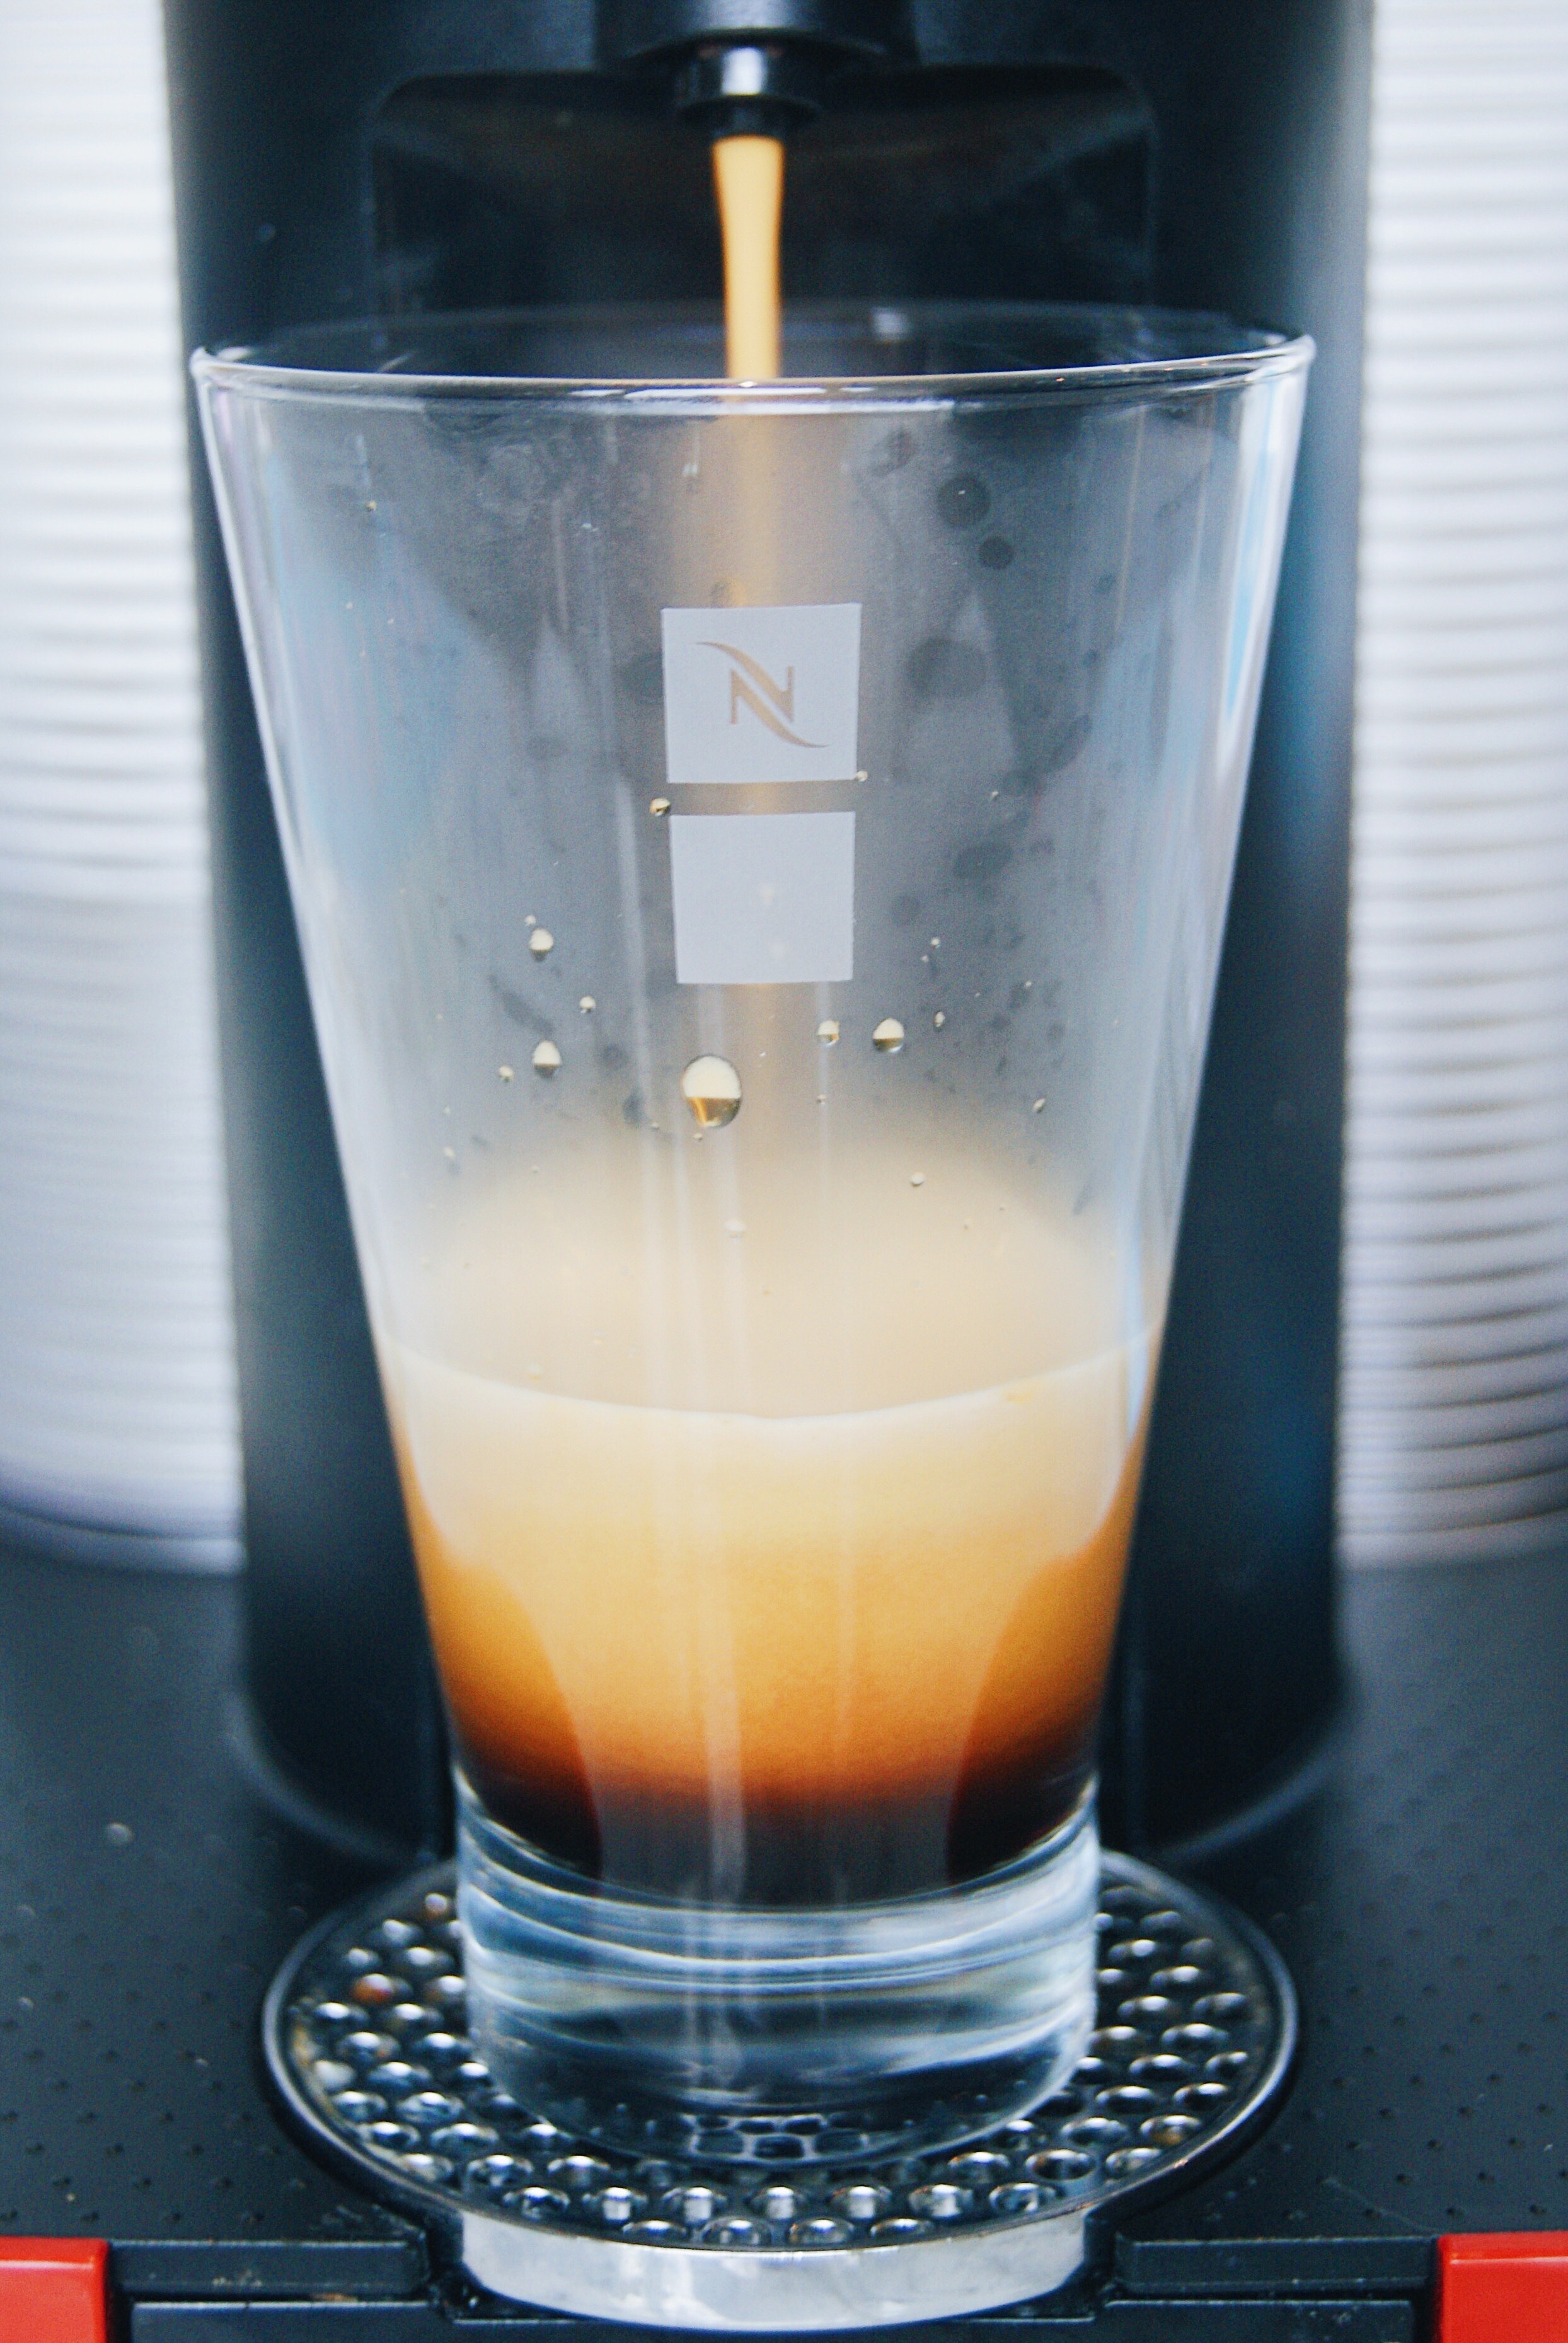
After testing AQUIEM though, we changed our minds. We decided to test it with both a drip coffee method and our Nespresso machine to see how different they tasted. We felt like we were back in high school working on our science project!

 Hypothesis: There would be no taste difference.

Method: Follow every instruction given to us by AQUIEM, while also measuring and cleaning everything precisely. Like many science projects our hypothesis was proven wrong.

Conclusion: We did taste a difference, enough to say the coffee tasted better with the AQUIEM water than when brewed with the tap water. The AQUIEM water made the coffee have less of a mineral taste and created a smoother finish.

We would definitely recommend this product to coffee connoisseurs or anyone who enjoys a perfect cup of coffee!

Happy Brewing!

xxx Ivy & Eve

Thank you AQUIEM for providing the products for this post.

Goat Cheese and Sweet Potato Wontons

These little bundles of joy are perfect for making with friends and family. They are pretty simple to make, and fun to fill. You can make the filling ahead of time and have everyone pitch in to fill the wonton wrappers. These are a perfect and tasty vegetarian appetizer and pair perfectly with a glass of bubbly or mimosas. We will surely be serving them at our next get together!

xxx Ivy & Eve

TIP: This recipe calls for what we, in the US, call sweet potatoes (which are true sweet potatoes) but in most grocery stores, they are labeled yams. Very confusing, we know. Here is an article from The Kitchn that explains it.

Makes around 30 wontons and dipping sauce.

Ingredients

  • 1 large sweet potato

  • 2/3 cup goat cheese

  • Package of wonton wrappers

  • Vegetable oil

  • Salt & pepper

  • 1/2 cup fresh squeezed orange juice (or fresh store bought)

  • 2 tsp grated ginger

  • 1 heaping tsp honey

Directions

  1. Prick the sweet potato all over with a fork, and microwave on a plate for 7-10 minutes, or until soft. Set aside and let cool a bit.

  2. In a small bowl, mix the fresh squeezed orange juice (we juiced our own), ginger, and honey in a small bowl. Set aside until ready to serve.

  3. Scoop the cooked sweet potato into a large bowl and discard the skin. Mash until smooth.

  4. Add the 1/2 of the goat cheese to the bowl, season with salt and pepper, and mix until smooth.

  5. Add the other 1/2 of the goat cheese and mix lightly. You want some goat cheese chunks in the mix.

  6. Fill each square wonton wrapper with 1 tsp of the mix to the center of the wrapper.

  7. Lightly wet the edges of the wrapper with water (using your finger) and fold diagonally.

  8. Gently squeeze the air out of the pocket and seal the edges.

  9. Heat about 1 inch of vegetable oil in a pan on the stove.

  10. Once hot, drop 1 filled wonton into the oil. Flip once after about 5 seconds and take the wonton out once the edges of the wrapper begin to brown. Place on a paper towel. The wonton will continue to brown after you take it out of the oil.

  11. Repeat until all of the wontons are fried.

  12. Serve on a large plate with the orange ginger honey dipping sauce.

  13. Enjoy!

Icebox Pumpkin Pie

As much as we love autumn, for us Californians, fall weather really doesn't begin until pretty late in the season. On the Central Coast, we still enjoy weekends by the pool and lots of warm sunshine until late October. We wanted to make a pumpkin pie a few weekends ago, but it was so hot out that we didn't want to turn the oven on! We loved our Magically Delicious Pie so much that we decided to make a pumpkin version. We chose to use Cinnamon Toast Crunch for the base, which works wonderfully with the pumpkin filling. We like to serve ours pretty frozen, but if you want more of a soft and fluffy texture, just take the pie out a little longer than we suggest. This is a perfect potluck dish because since you freeze it until serving, you can keep it in the freezer until you leave and let it defrost on the way!

We are sure this recipe is soon to be a new favorite!

xxx Ivy & Eve


Makes one pie with 12 small slices.

Ingredients:

  • 1 box Cinnamon Toast Crunch

  • 8 tablespoons melted butter

  • 2 cups heavy cream

  • 1/4 cup powdered sugar

  • One 7 oz. jar of marshmallow fluff (about 1 1/2 cups)

  • 8 oz. cream cheese, softened

  • 3/4 cup canned pumpkin

  • 1 1/2 tsp pumpkin pie spice

Directions:

  1. Preheat the oven to 400F degrees. 

  2. Melt the butter in a small bowl.

  3. Add 6 cups of the cereal to the food processor. Pulse until you get fine crumbs. Pour in the melted butter and pulse until all the crumbs are moistened.

  4. Pour the crumbs into a 9-inch pie pan and press mixture on the bottom and around the sides to form the pie crust.

  5. Place the crust in the oven and bake for 5-7 minutes until it is slightly golden. Then place the crust in the freezer to cool while you prepare the filling.

  6.  Whip the heavy cream in a mixer until it starts to thicken and then add powdered sugar. Whip until stiff peaks form. Place the whipped cream in the refrigerator while you make the other mixture.

  7. Beat the softened cream cheese and marshmallow fluff with an electric mixer until light and fluffy (about 5 minutes). Add the pumpkin and pumpkin spice then mix until incorporated. Fold in the whipped cream. 

  8. Pour the mix into the chilled pie crust and smooth with a spatula.

  9. Lightly crush 1/2 cup of Cinnamon Toast Crunch in a Ziploc baggie and sprinkle on the edges of the pie filling.

  10.  Freeze for at least 3 hours. When it is time to serve, take it out of the freezer and slightly let soften for 10 minutes.

  11. Slice and serve! 

IMG_0199.jpg

Pumpkin Palooza at Trader Joe's

Pumpkin season is in full swing and nobody does it better than Trader Joe's. They have a whole section including over 60 different items made with pumpkin. They call this area "Pumpkin Palooza"! We decided to go to our local Trader Joe's market and try out as many pumpkin goodies as we could. Here's only a fraction of what they carry. Hurry to your local store to test them out yourself!

xxx Ivy & Eve

Not technically pumpkin but SO delicious!

Not technically pumpkin but SO delicious!

Magically Delicious Pie

DSC00280.jpg

As children, we spent part of our summer vacations on Lake Erie in Ohio visiting our Grandma C and many aunts uncles and cousins. Those weeks were the highlight of summer, spending the hot and humid days swimming in the lake, walking down the street to buy candy at the corner shop, and convincing the adults to drive us to our favorite drive-in restaurant, White Turkey, AT LEAST once a day. Another perk of being at Grandma's was that she always had sugary sweet cereals and treats in her house during our visits. All the cousins would come down stairs each morning and pour a bowl of their favorite cereal and plan the adventures to be had that day. Our personal favorite was a big bowl of Lucky Charms (We affectionately called them Monkey Germs lol). This pie is a frozen take on our beloved cereal. This recipe transports us back to Grandmas house by the lake. We can almost feel the warm breeze drifting off the lakeshore and hear the distant rumble of a coming thunderstorm. 

xxx Ivy & Eve

Adapted from The Slow Roasted Italian.

Makes one pie with 12 small slices.

Ingredients:

  • 1 box Lucky Charms Cereal

  • 8 tablespoons melted butter

  • One 7 oz. jar of marshmallow fluff (about 1 1/2 cups)

  • 8 oz. cream cheese, softened

  • 2 cups heavy cream

  • 1/4 cup powdered sugar

Directions:

  1. Preheat the oven to 400 degrees. 

  2. Separate the cereal and the marshmallows into two separate bowls.

  3. Melt the butter in a small bowl.

  4. Add 4 cups of the cereal to the bowl of a food processor. Pulse until your mixture is crumbs. Pour in the melted butter and pulse until all the crumbs are moistened.

  5. Pour the crumbs into a 9 inch pie pan and press mixture on the bottom and around the sides to form the pie crust.

  6. Place the crust in the oven and bake for 5-7 minutes until it is slightly golden. Then place the crust in the freezer to cool while you prepare the filling.

  7.  Whip the heavy cream with a mixer until you can starts to thicken and then add powdered sugar. Whip until stiff peaks form. Place the whipped cream in the refrigerator while you make the other mixture.

  8. Beat the cream cheese and marshmallow fluff with an electric mixer until light and fluffy (about 5 minutes). Fold in 1/2 of the whipped cream and a 1/2 cup of the Lucky Charms marshmallows. Pour the mix into the chilled pie crust and smooth with a spatula. Pour remaining whipped cream over top and sprinkle the remaining marshmallows around the edge of the pie. Freeze for at least 3 hours. When it is time to serve, take it out of the freezer and let soften for 10 minutes.

  9. Slice and serve! 

Watermelon Lime Basil Popsicles

Midsummer in the Valley brings high temps and if you're lucky, long days spent by the pool. This past weekend was no exception, and we decided to concoct a popsicle recipe for something tasty and refreshing. Watermelon was our choice for the base, light, refreshing, and crisp. We then picked a lime to add some zing, ending with a little basil. Summer fruits are naturally sweet so we didn't use any added sugar making them surprisingly healthy. We used our Zoku Quick Pop Maker which freezes popsicles in as little as 15 minutes! We ended up eating the whole batch before we even thought about cleaning up! We think these little pops turned out perfectly. They are refreshing and ready for a poolside staycation!

xxx Ivy & Eve


Makes 6 Zoku quick pops or 6 regular popsicles.

Ingredients:

  • Diced fresh seedless watermelon
  • 1 Lime (juice)
  • 2-3 Basil leaves

Directions:

  1. Dice watermelon into cubes, place in blender. Blend till you make around 2 cups liquid. 
  2. Squeeze 1 lime into watermelon slurry. blend for 30 seconds.
  3. Place 2-3 leaves of basil in blender. (amount depends on preference). Blend till pieces are small but not tiny. (size is also up to preference).
  4. Pour mixture into popsicle molds. We use the Zoku Quick Pop Maker.
  5. If you use the Zoku Quick Pop Maker let freeze according to directions, making 2 batches for a total of 6 pops. 
  6. If you use a regular popsicle mold, place in freezer for a few hours until frozen. 
  7. Serve or Store!

Nectarine and Burrata Salad

We are lucky that our hometown has fantastic farmers markets year-round. We try to shop them as often as possible, buying the seasons freshest produce and supporting the small local farmers. In the summer, we love to pick up nectarines and other summer stone fruits to use in recipes and to eat by themselves. Nectarine and burrata salad is one of our favorite summer dishes. You can use white or yellow nectarines, or some of each, which we like to do! It is perfect for serving as an appetizer or alongside something light like grilled chicken. To make this dish more substantial, you can serve it on a bed of arugula with fresh baguette on the side.

xxx Ivy & Eve

Serves 4 as a side dish, 2 as a main.

Ingredients

  • 3 large nectarines halved (4 if small), pitted, and sliced into 1/2 inch slices

  • One burrata cheese ball (we got ours at Whole Foods)

  • Olive oil for drizzling

  • 1 tablespoon of tarragon leaves, stems removed and roughly chopped

  • Flaky sea salt

  • Pepper

  • Arugula (optional)

  • Freshly sliced baguette (optional)

Directions

  1. If using arugula, arrange it on a large platter.

  2. Add the nectarine slices neatly - slightly overlapping the slices in the middle of the platter (or on the arugula)

  3. Slice the burrata in half and then tear the cheese into smaller pieces (it will be messy and gooey) onto the slices of nectarines. YUM!

  4. Sprinkle the tarragon leaves on the top.

  5. Season with salt and pepper.

  6. Drizzle with olive oil.

  7. Serve with sliced baguette. (optional)

  8. Enjoy!

Father's Day Float!

Just in time for Father's Day, we decided to share one of our new favorite recipes that is "Dad approved". We discovered this tasty delight at one of our favorite local coffee shops, Crema, in Pacific Grove. Ivy was a little wiry of this concoction when Eve ordered it from the menu, but after taking a sip herself, Ivy decided it was delicious. We didn't get this recipe from Crema, but it tastes pretty darn close! Their espresso shot was super smooth (which was delicious), whereas our espresso was a bit more intense. It totally depends on your preferences. Its fairly simple to make however we recommend trying it out at Crema yourself first. We made this for our Dad before we left for Europe as an early Father’s Day treat. We think any Dad (or beer lover) will love this sweet treat!

xxx Ivy & Eve

Makes two floats.

Ingredients

  • 1 bottle Samuel Smith's Organic Chocolate Stout beer (You can find it at most beer shops or at Total Wine & More.)

  • Good Chocolate syrup

  • 2 shots of espresso- We used our Nespresso machine

  • Good vanilla ice cream

 Directions

  1. Chill pint glasses in the freezer for several hours. (optional)

  2. Brew one shot of espresso for each (2 total) and let cool slightly.

  3. Drizzle chocolate syrup on the inside of each glass.

  4. Scoop out 2-3 scoops of ice cream into each glass.

  5. Add one espresso shot to each.

  6. Top with Chocolate Stout.

  7. Enjoy!

Raspberries Romanoff

Ever since we can remember, our Dad has been whipping up Raspberries Romanoff for dessert. We loved it when our Dad made this because it looked and sounded so fancy! Now that we are older, we are surprised how easy it is to make this delicious dessert!

xxx Ivy & Eve 

Serves two. 

Ingredients

  • 1/2 cup whipping cream

  • 1/2 cup (about 3 scoops) vanilla ice cream

  • 1 six-ounce carton of Raspberries

  • 1 tablespoon powdered sugar

  • 1 tablespoon Grand Marnier 

Directions

  1. Chill a mixing bowl in the freezer for at least 10 minutes. 

  2. Pour whipping cream into the chilled bowl and mix on high until it begins to thicken. 

  3. Add the sugar and mix till the cream starts creating peaks. 

  4. Gradually add the ice cream in small scoops. Mix until the ice cream is incorporated but still has chunks of ice cream (you want a bit of texture to your topping). 

  5. Finally, add the Grand Marnier and fold into the mixture. 

  6. Place half the raspberries into two serving glasses and the whipped topping on top. 

  7. Add a few raspberries and mint on top for garnish. 

  8. Enjoy!

TIP: If you like your dessert to have a bit more kick, add some more Grand Marnier! You can also mix it up and try it with strawberries, blueberries, or blackberries! 


Chocolate Covered Strawberries for Mother's Day & Free Printable Card!

With Mother's Day just around the corner, Eve and I were toying with ideas of what to give our Mom this year. After some time thinking, we decided we would make her chocolate-covered strawberries. We always buy these yummy morsels when we spot them in cafes and chocolate shops but had never really attempted to make any ourselves. It was SO simple, not to mention affordable! We recommend pairing these with a bottle of bubbly, naturally. We also designed a cute card to go with them for your Mom, because she really is the sweetest! Download the full-size card (we made a mini one to fit better in the pictures) for FREE by subscribing HERE! If you already subscribe, don't worry. We will be sending it to you shortly. Cheers to all our sweet Mothers! 

xxx Ivy & Eve

Ingredients & Supplies

  • High-quality white & dark melting chocolate 

  • Strawberries

  • Sprinkles, Nuts, and anything you want to top them with (optional)

  • Baking sheet

  • Parchment paper

 Directions

  1. Place melting chocolate in a microwave-safe bowl (you can also melt on the stove if you have more time).

  2. Set the microwave to 30-second increments and stir until just melted.

  3. Place parchment paper on baking sheet

  4. Simply dip the strawberry in chocolate

  5. Top with sprinkles or whatever your heart desires

  6. Let cool and set in the refrigerator before serving (they are best eaten the day of or next day).

Your Mom will LOVE them, we promise!


Mad for Madeleines

Ever since we were little, we have loved all things pretty and sweet. We entirely blame our dear Grammy G for this trait, as she was known to skip dinner in anticipation of the dessert! Ever since Eve began baking, she has always had a particular love for French sweets. Naturally, one of the first things she mastered was the madeleine. These little shell-shaped cookies are a perfect accompaniment for tea time, and we find they go perfectly with a glass of bubbly! We suggest pairing madeleines with a bright and crisp sparkling wine with citrusy notes and a hint of toasty flavors such as Gruet Brut and the spurge worthy Perrier-Jouet's Gand Brut

Be sure to download our printable recipe card!

xxx Ivy & Eve

Adapted from the Patisserie Lerch in Paris (sadly now closed) via Paris Sweets

Makes two dozen madeleines.

Ingredients

  • 1 1/2 cups all-purpose flour

  • 1 teaspoon double-acting baking powder

  • 4 large eggs, at room temperature

  • 1 cup sugar

  • Grated zest of 1 lemon

  • 4 teaspoons vanilla extract

  • 10 tablespoons (5 oz) unsalted butter, melted and cooled

Directions

  1. Using a mixer with the whisk attachment, beat the eggs and sugar together on medium-high speed until they thicken and lighten in color (around 3 minutes).

  2. While the eggs and sugar are beating, sift together the flour and baking powder in a bowl.

  3. Beat in the lemon zest and vanilla. Switch to a large rubber spatula and gently fold in the dry ingredients, followed by the melted butter.

  4. Cover the batter with plastic wrap, pressing the wrap against the surface to create an airtight seal, and chill for at least 3 hours. The longer it chills. the better. We keep ours in the fridge overnight. The chilling helps create the characteristic humps on the back of the cookies.

  5. When you are ready to bake the cookies, preheat the oven to 400 degrees F (200 degrees C).

  6. Generously butter it, dust the insides with flour and tap out the excess. If the pan is nonstick, better to be safe than sorry and butter and flour it. We use Pam for Baking whenever a recipe calls to butter and flour the pan. It’s so much easier and less messy and hasn’t failed us yet! Then place the pan on a baking sheet for easy transport to the oven. 

  7. Spoon the batter into the molds, filling them almost to the top. One heaping spoonful is about right. Don’t worry about smoothing the batter. It will even out as it bakes. 

  8. Bake large madeleines for 11 to 13 minutes, small ones for 8 to 10 minutes, or until the cookies are puffed and golden and spring back when touched.

  9. Remove the cookies by either rapping the pan against the counter (the madeleines should drop out) or gently running a knife around the edges of the cookies. Allow the madeleines to cool on a cooling rack.

  10. Sprinkle powdered sugar on top and serve warm or at room temperature.

  11. Enjoy!

Madeleines are best eaten the day they are made. Honestly, It is hard to wait until they are even cooled before devouring them! ENJOY!


Variations

  • Cut the vanilla in half and add 2 teaspoons of rose water. This reminds us of a fancy high tea!

  • Substitute the lemon zest for orange for a lively little kick.

  • We like to add a pinch or two of cinnamon and nutmeg to the batter in the winter.

Be sure to download our printable recipe card!