dessert

Baked Panettone French Toast

Panettone

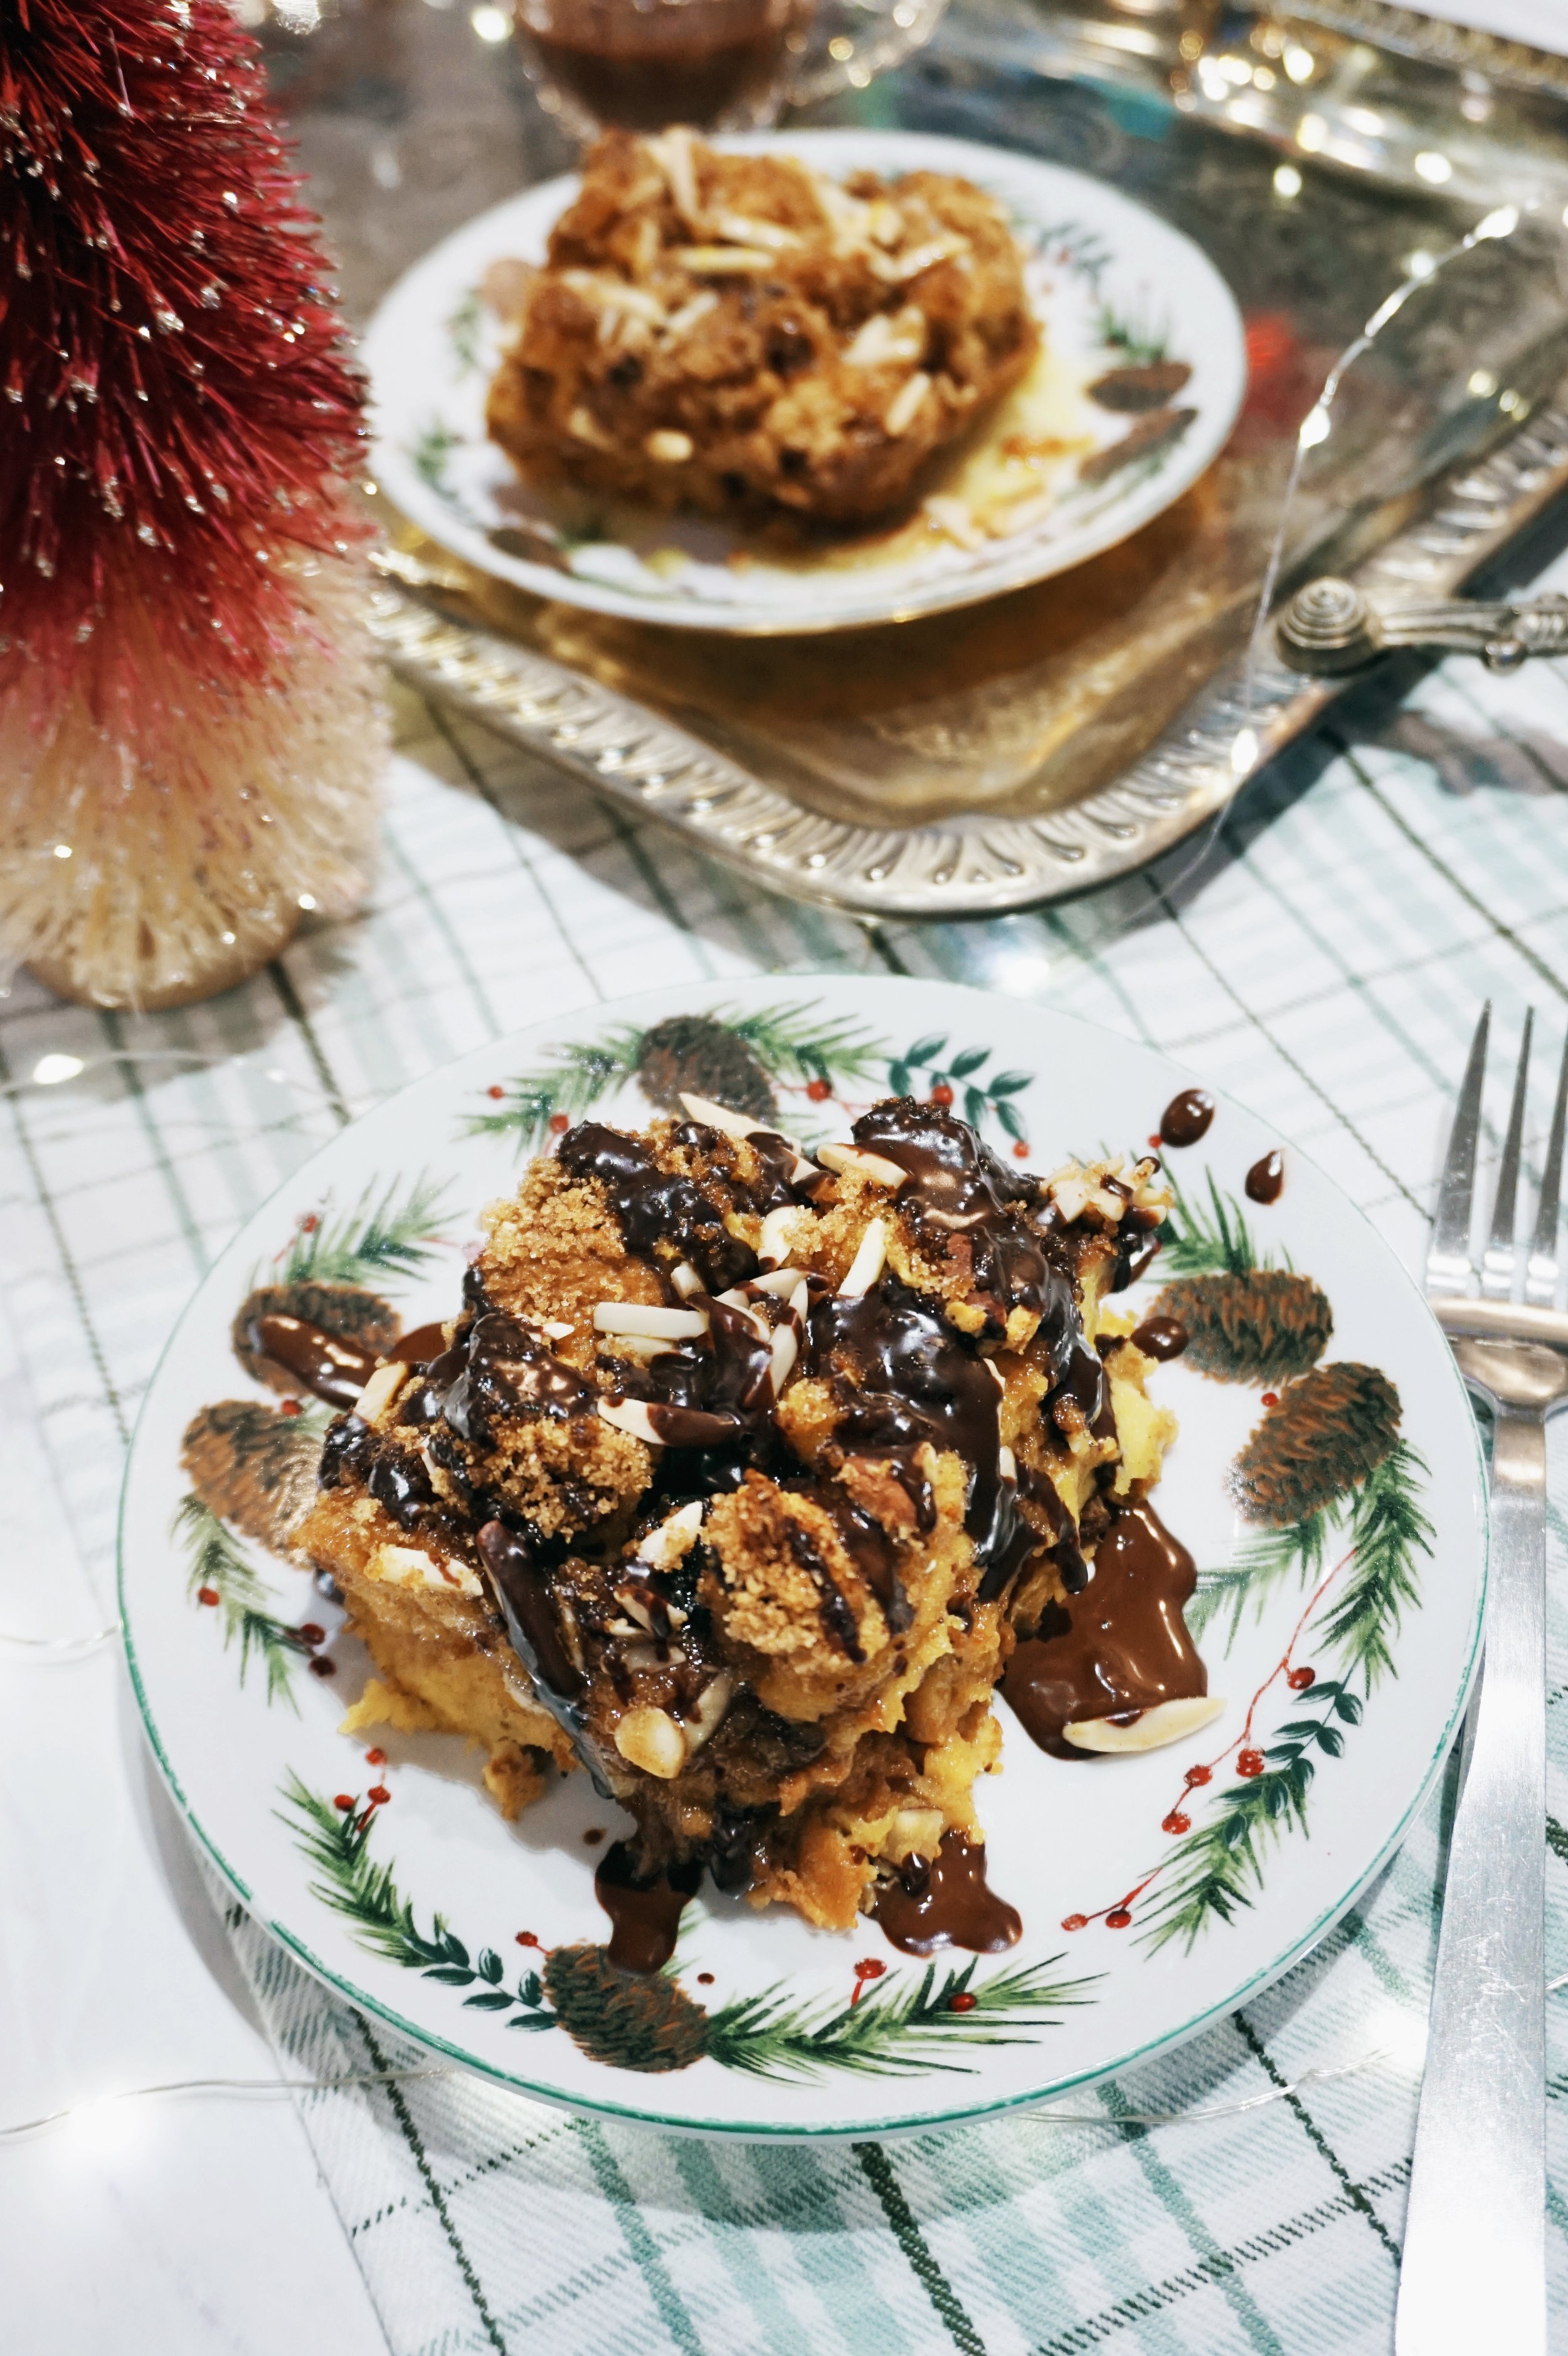
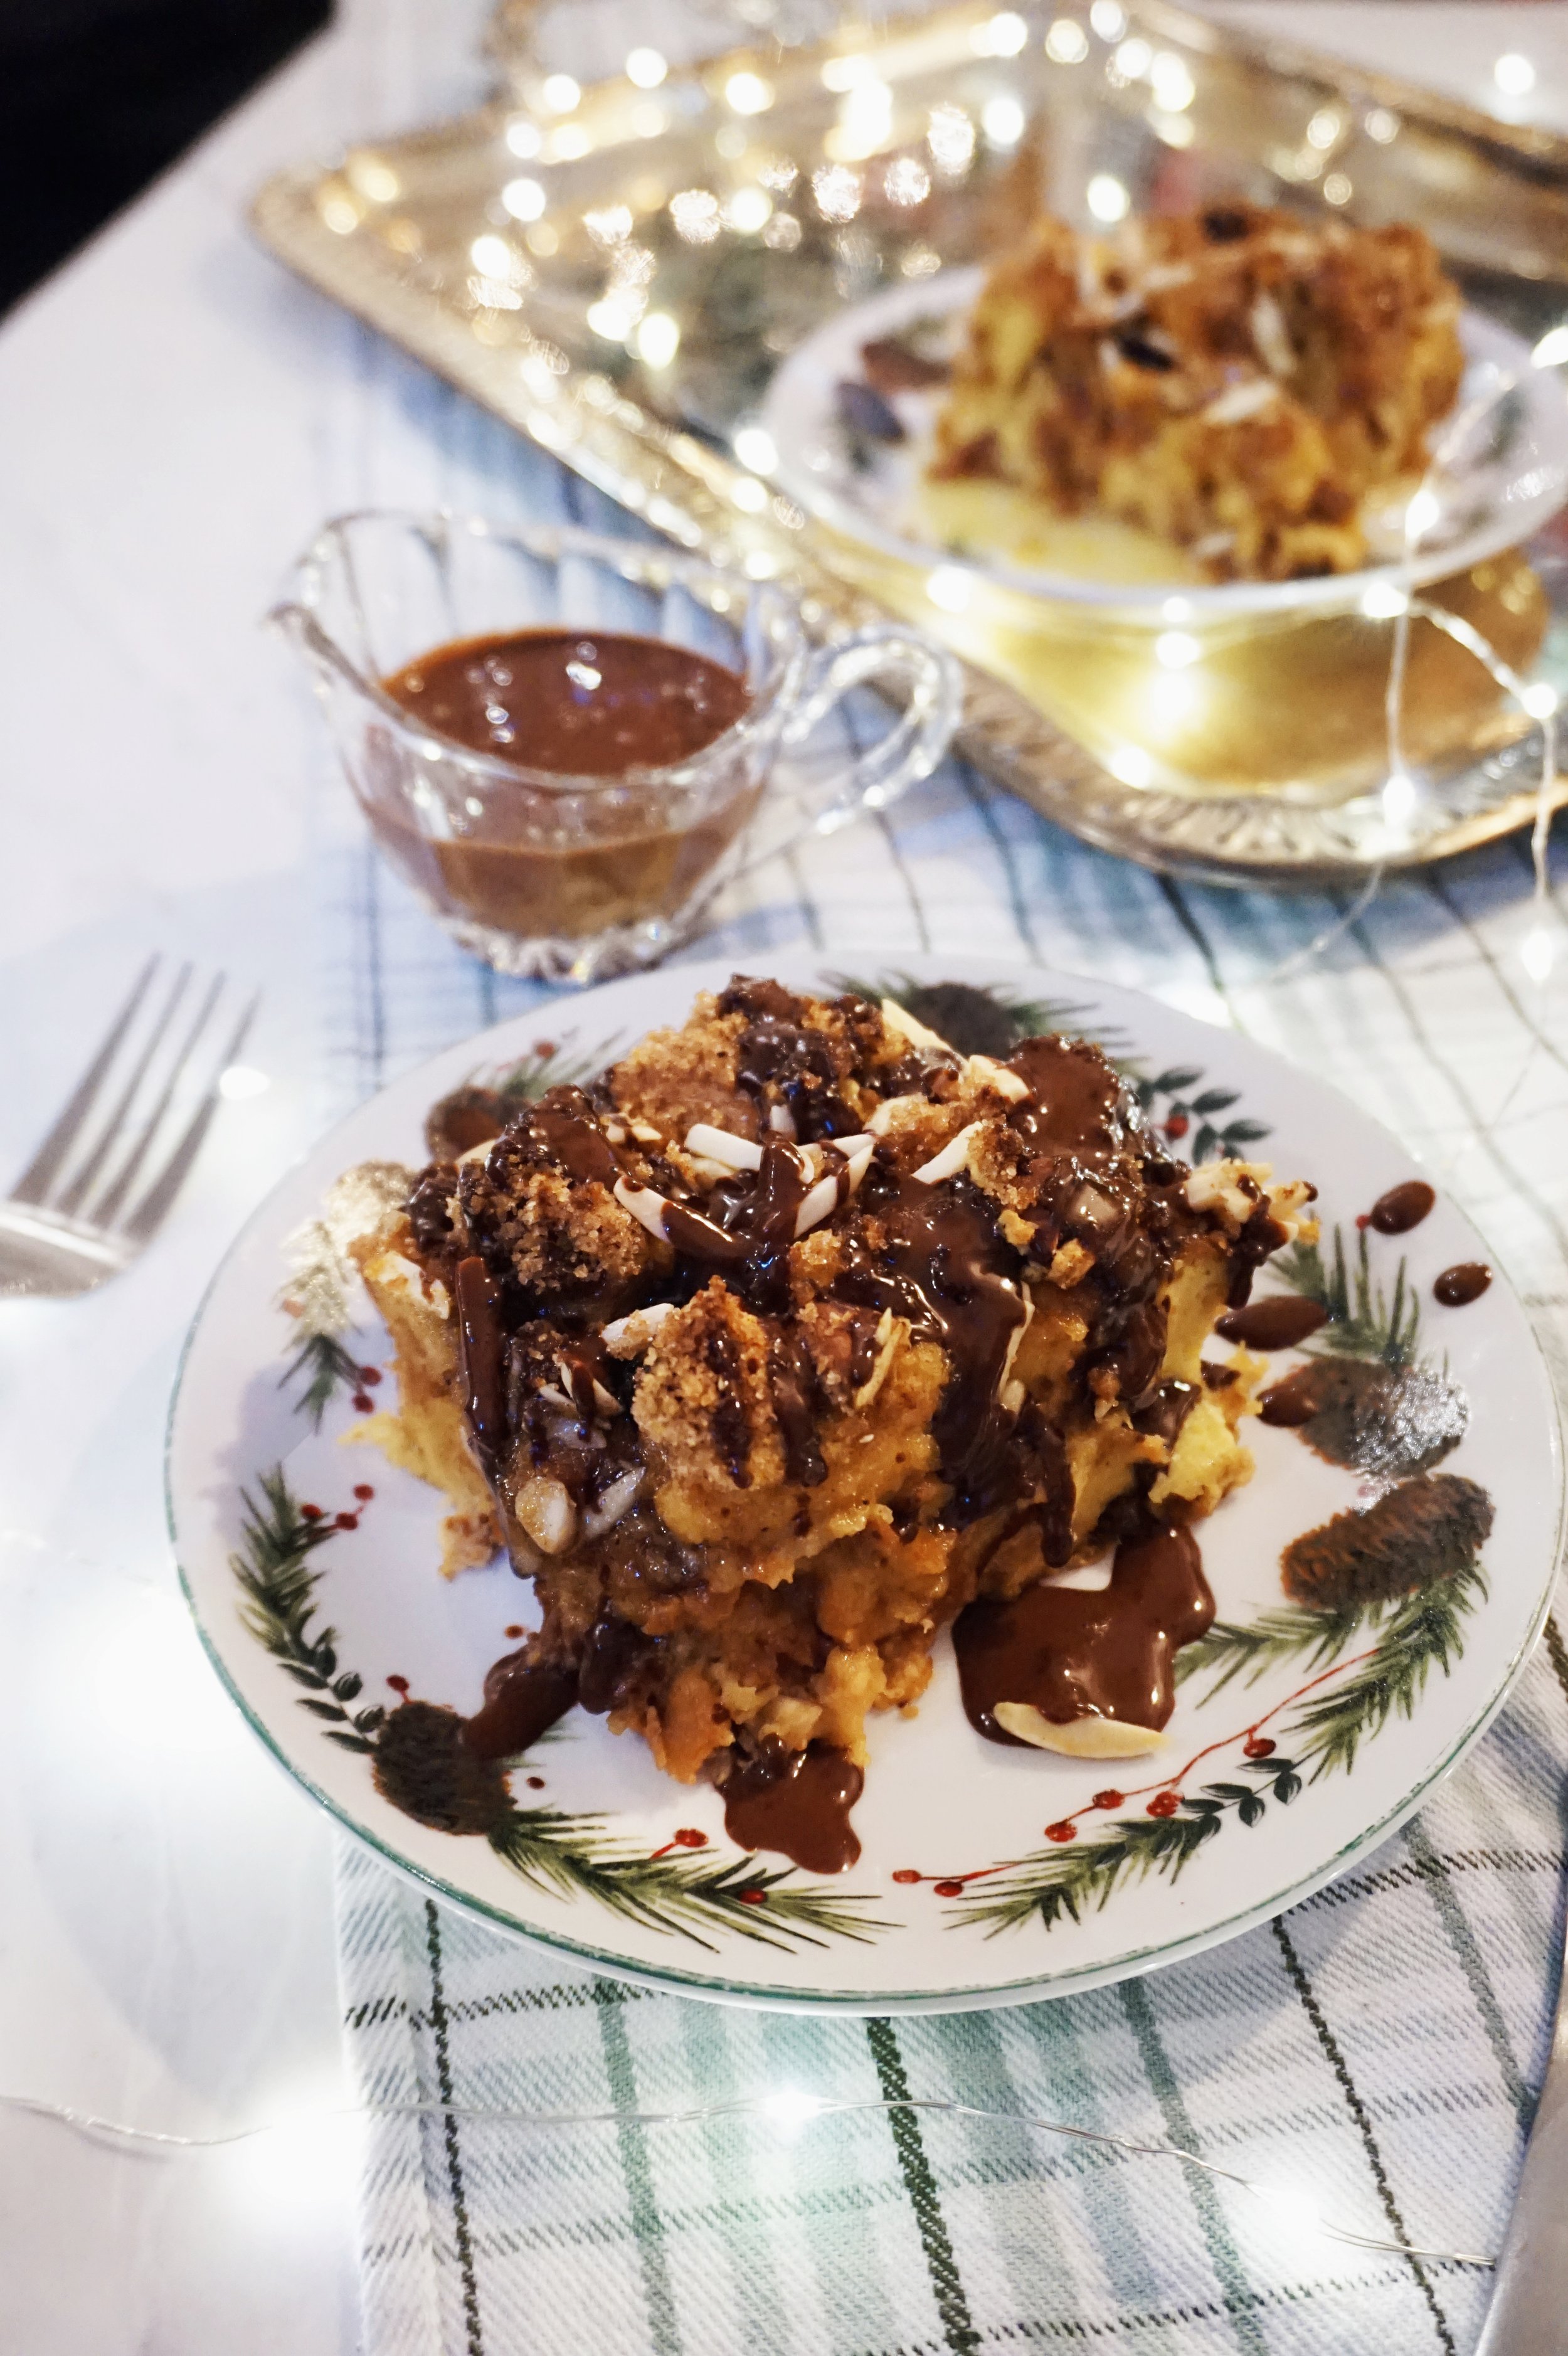
This recipe stems from our family being gifted many panettones throughout the years and never eating one of them. It's not that we don't like them, it's that we just never remember to eat them! This year, when Ivy came home holding a panettone that she had been given, Eve was determined to put it to good use. We both tasted the delightfully spiced and sweet bread spiked with almonds and candied oranges and raisins and knew it would make a delicious baked french toast. This recipe is the perfect breakfast for Christmas morning or one of the lazy days between Christmas and New Year since you make everything ahead of time. The chocolate sauce and orange syrup work equally well with the panettone flavors. Ivy likes hers with both poured on hers!

Tip: This breakfast is decadent enough to be served as a dessert. If so, just call it a "bread pudding"! 

xxx Ivy & Eve

Makes 4 large portions or 6 smaller portions.

Ingredients:

French Toast

  • 1 panettone (around 1 pound)

  • 5 eggs

  • 1 1/4 cups milk or half and half

  • 1 tsp vanilla

  • 1 pinch nutmeg

  • I pinch cinnamon

  • 1 pinch of salt

Topping

  • 1/4 cup slivered almonds

  • 4 tbsp brown sugar

  • 1 pinch nutmeg

  • 1 pinch cinnamon

Orange syrup

  • 4 tbsp melted butter

  • 1 cup powdered sugar

  • Zest from 1 orange

  • 2-3 tbsp orange juice from the zested orange

  • 1.5 tsp vanilla extract

Chocolate sauce

  • 1 cup chopped dark chocolate or semi-sweet chocolate chips

  • 3/4 cup half and half or milk

  • 1 pinch salt

Directions:

To make the french toast:

  1. Grease a 9x9 glass dish or baking pan. 

  2. Cut the panettone into roughly 1-inch cubes. 

  3. Toss the cubes into the baking dish.

  4. Add the milk, eggs, nutmeg, cinnamon, vanilla, and salt to a large mixing bowl. Whisk. 

  5. Pour the eggy mixture over the cubes, gently fold the unsoaked bread under the soaked, making sure each cube is wet. 

  6. Cover and keep in the fridge overnight (or at least 4 hours).

To make the topping:

  • Mix the slivered almonds, brown sugar, nutmeg, and cinnamon.

  • Cover and keep until you bake the french toast. 

To make the orange syrup:

  1. Melt the butter. 

  2. Measure out the powdered sugar into a large bowl.

  3. Add the melted butter, 2 tbsp orange juice, orange zest, and vanilla.

  4. Whisk until smooth. If it is too thin, add more powdered sugar. If it is too thick, add a little more juice. If you have a hard time getting the syrup smooth, microwave it for 5 seconds and whisk again. 

  5. Serve immediately or cover and keep refrigerated until serving. Then warm it in the microwave until it is a syrup consistency again. 

To make the chocolate sauce:

  1. Add the chocolate and 3/4 cup of the half and half (or milk) to a small saucepan on low heat. 

  2. Gently whisk periodically until chocolate is melted.  

  3. If the sauce is too thick to pour, add a little more half and half. 

  4. Serve immediately or let cool and refrigerate until serving, then microwave 15 seconds at a time, stirring between, until warmed and smooth. 

When ready to bake: 

  1. Preheat your oven to 350F. 

  2. Sprinkle the topping over the dish.

  3. Bake for 30-40 minutes, or until the eggy mixture is set and has a lovely golden top.

  4. Serve with melted butter, orange syrup, and chocolate sauce.

  5. Enjoy!

Panettone

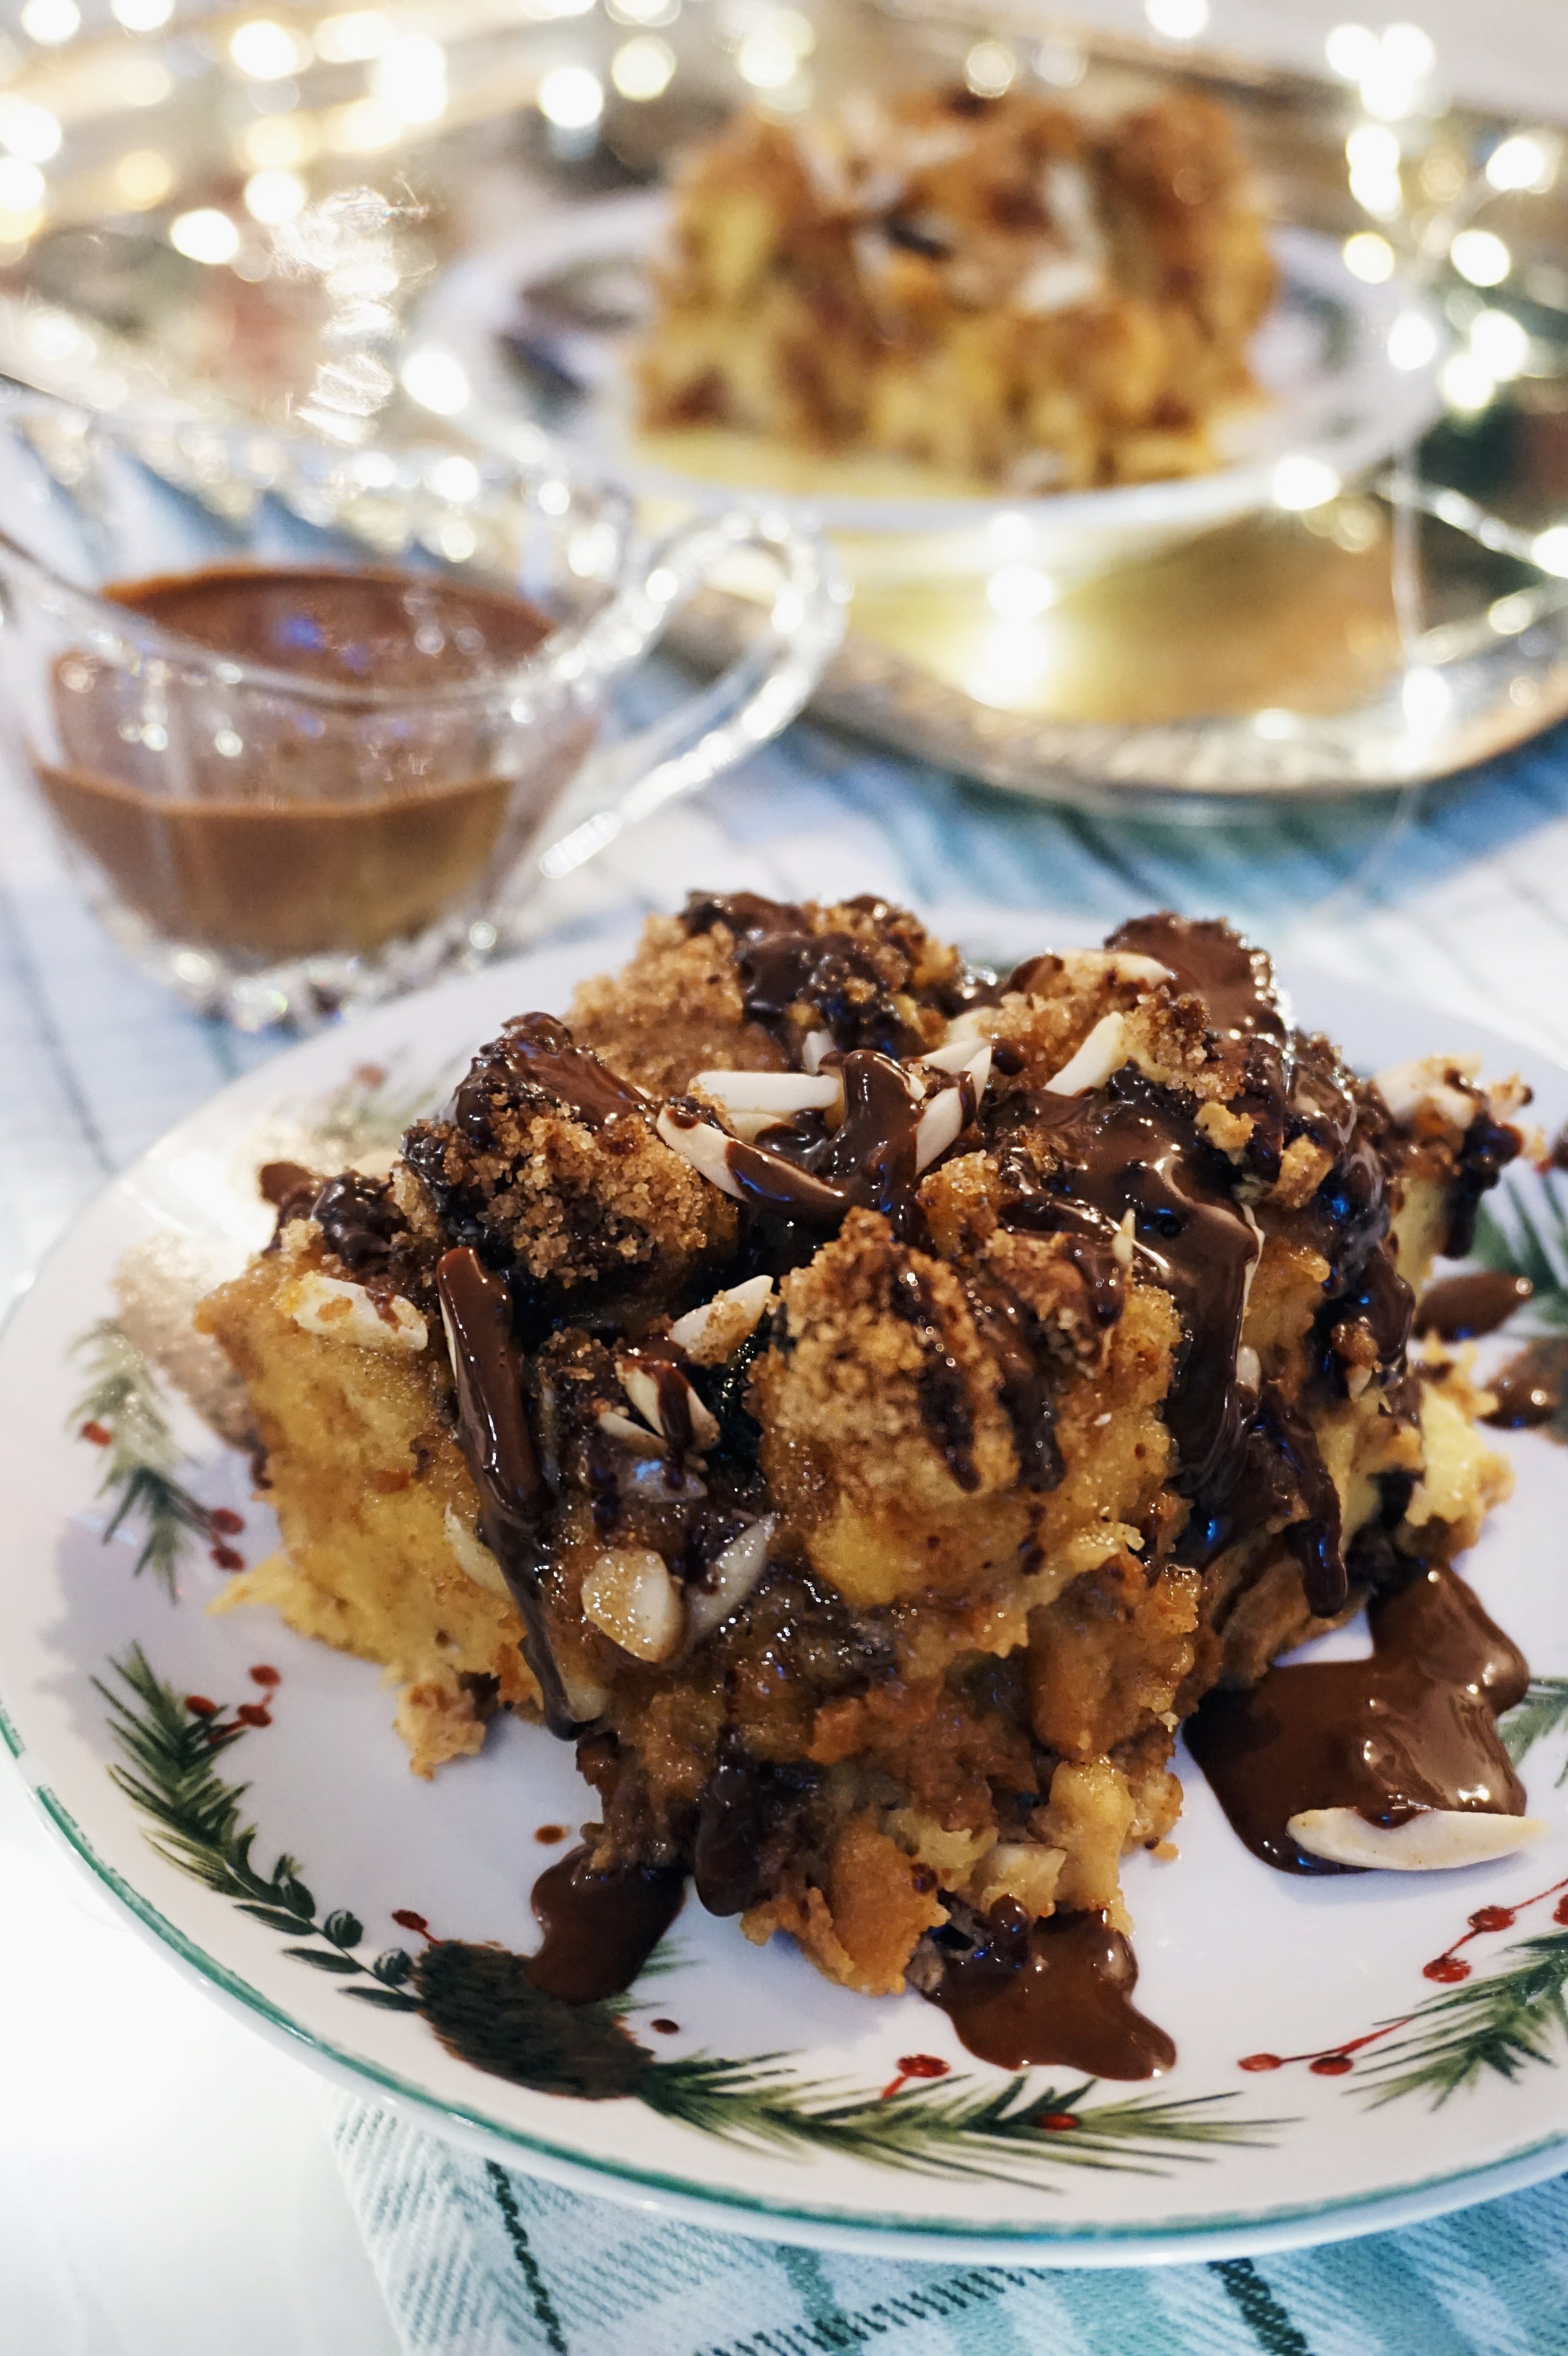
Panettone with chocolate sauce

Panettone

Panettone with orange syrup

Panettone
panettone
panettone

3 Ingredient Cold Brew Coffee Ice Cream

IMG_0097.JPG

We LOVE ice cream in the summer and remember our Mom making ice cream from scratch while we were growing up. Ice cream always tastes better when it is homemade and not from the store! 

This is by far, the EASIEST ice cream recipe we have seen and it results in creamy, delicious, rich coffee ice cream that even rivals HΓ€agen-Dazs!

xxx Ivy & Eve

Makes about 2 pints.

Requires an ice cream maker. We use the Cuisinart Ice Cream Maker (only $69.95!)

Ingredients:

  • 2 cups heavy cream

  • 1 (12 oz) can sweetened condensed milk

  • 1/2 cup of your favorite cold brew concentrate

Directions:

  1. Combine all ingredients in a large bowl.

  2. Pour 1/2 into the ice cream maker (your ice cream maker may be able to fit more. Ours only fit 1/2 of this recipe).

  3. Make ice cream according to the machine. Ours took about 20 minutes to become soft-serve consistency.

  4. Pour into a freezer-proof container. We use Tovolo ice cream containers.

  5. Freeze completely (at least 3 hours.)

  6. Repeat steps 1-5, adding the second batch to the ice cream container.

  7. Take out of the freezer 10-15 minutes before serving.

  8. Scoop into coffee cups, bowls, or cones with an ice cream scoop.

  9. Enjoy!

IMG_0101.JPG
IMG_0098.JPG
IMG_0099.JPG
IMG_0100.JPG

Sugar Dusted Cranberries

We love gifts, and we love giving gifts to people, so each Holiday season we like to give a little something to everyone we know. Since gifting can get expensive we often make our gifts. This year we are handing out candied nuts, christmas cookies, and these delicious sugar dusted cranberries. These are the perfect gift to give party hosts, coworkers, and friends. This recipe is simple, delicious, and we love how the cranberries look like they have been dusted by snow! We usually wrap them up in a cute jar and hand them out, but they are also perfect for garnish on cocktails (cocktail recipe coming later this week).

xxx Ivy & Eve 

Ingredients:

  • 1 bag of cranberries 12 oz
  • 4 cup granulated sugar (may use less)
  • 1 cup water

Directions:

  1. Combine sugar and water in saucepan. Heat up until the sugar is fully dissolved creating a simple syrup. Remove from heat. Make sure the mixture is not boiling or it can cause cranberries split or pop in the next step.
  2. Transfer simple syrup into large bowl
  3. Pour cranberries into simple syrup, mixing to coat each berry.
  4. Let mixture sit in refrigerator over night (if you are short on time a few hours will work).
  5. Remove mixture from refrigerator. Separate syrup from cranberries (keep the syrup to use for cocktails!).
  6. Pour some sugar into a small bowl and spoon out cranberries onto the sugar.
  7. Roll cranberries in sugar till they are fully coated with sugar. Add sugar to bowl as needed.
  8. Set on baking rack to dry. (1-2 hours)

Enjoy!

Pumpkin Chocolate Chip Cookies

Fall is one of our favorite seasons because we love comfy sweaters, the leaves changing color, and most of all...pumpkin recipes! There are so many different pumpkin recipes we love to make this time of year and we cannot wait to share some with you. Up first is the BEST pumpkin chocolate chip cookies. With the added pumpkin puree they stay more moist then your average chocolate chip cookie. These are seriously delicious and the flavor is exactly of how we imagine autumn to taste. You may want to make 2 batches as they disappear before your eyes!

Warning: We are not responsible for any cookie addictions this post may create!

xxx Ivy & Eve

Ingredients:

  • 15 oz. pumpkin puree
  • 1 egg
  • 1/2 cup vegetable oil
  • 1 cup sugar
  • 2 cups flour
  • 2 tsp baking powder
  • 1/2 tbsp ground cinnamon
  • 1/2 tsp salt
  • 1 tsp baking soda
  • 1 tsp milk
  • 1 tbsp vanilla extract
  • 16 oz. semi-sweet chocolate chips

Directions:

  1. Preheat oven to 350 F.
  2. Combine pumpkin, vegetable oil, egg, and sugar in a mixing bowl. In a separate bowl mix together the flour, cinnamon, baking powder, and salt.
  3. Dissolve the baking soda into the milk. Mix this into the bowl of wet ingredients.
  4. Add the dry mixture to the wet mixture.
  5. Add the vanilla and chocolate chips. Mix well.
  6. Drop heaping spoonfuls of the dough onto a cookie sheet lined with parchment paper.
  7. Bake for 8-12 minutes (depending on the size it may be more, we make ours BIG).
  8. Remove from oven, let cool on baking sheet for 3 minutes.
  9. Place on cooling rack.

Enjoy!

Blueberry-Lavender Tart

Between the two of us, Eve has always been the baker. Ivy would always help Eve bake cupcakes and tarts but would never try to make something entirely on her own. However, once Eve was away at college Ivy had no one to bake sweets for her, so she had to take matters into her own hands. Ivy saw a recipe in Martha Stewart Living for mini blueberry-lavender cornmeal tarts. Not only did the photos look delicious, but it combined basically everything she loves...blueberries, lavender, and cream! Ivy decided to try and make the tart in a big tart pan instead of little mini pans to limit her chances of burning them (remember Ivy was not a skilled baker compared to Eve). The tart was pretty simple and it turned out perfect the first time! We recently tried it with gluten free crust to accommodate some of our friends diet restrictions and it tasted great! We have listed both the cornmeal and gluten free crust recipes below. Ever since, this recipe has been one of our go-to tarts to make for summer parties because it is light but still hits the sweet spot. 

xxx Ivy & Eve

Recipe adapted from Martha Stewart Living

Ingredients

Cream:

1 cup heavy whipping cream

1 1/2 to 2 tablespoon culinary lavender (depends on how strong you want the flavor)

1-2 tablespoons of sugar (optional)

Cornmeal Crust:

1 cup all-purpose flour, plus more for dusting

1/4 cup finely ground cornmeal

1 tablespoon plus 1 1/2 teaspoons sugar

1/2 teaspoon coarse salt

1 stick plus 2 tablespoons cold unsalted butter, cut into small pieces

1 large egg yolk

2 tablespoons ice water

Gluten Free Crust:

1 1/2 cups gluten free flour (we suggest Trader Joe's or Bob's Red Mill)

2 tablespoons sugar

1 pinch salt

7 tablespoons cold butter (sliced into pieces)

1-3 tablespoons cold water to bind

Filling:

2 tablespoons sugar

1/4 vanilla bean, seeds scraped

1 to 2 cups fresh wild or regular blueberries or huckleberries

Directions

  1. Cream: Place the cream and lavender in a sauce pan on the stove. Bring just to a boil (as if you were making tea) and remove from heat and cover. Let the cream and lavender "steep" till cool. Once cooled refrigerate.

  2. Two options Cornmeal or Gluten Free Crust

    1. Cornmeal: Combine sugar, cornmeal, flour, and salt in a food processor. Once mixed evenly add butter and pulse till the texture looks like coarse crumbs. Then add the yolk and ice water, pulse again till mixture is dough like. Knead dough until it is smooth. Then shape into a disk and wrap with plastic wrap and refrigerate at least 30 minutes. After 30 minutes or more take dough out and let it warm to room temperature. Roll it out with a little flour to around 1/8 inch thick. Then transfer to tart pan. Pressing dough to the sides and stab the dough with a fork along the bottom. Put back in the refrigerator for another 30 minutes.

    2. Gluten Free: Combine the flour, sugar, salt, and butter in a food processor. Pulse till the texture looks like coarse crumbs. Add a little bit of water while pulsing until the dough combines and looks like pebbles. Then shape into a disk and wrap with plastic wrap and refrigerate at least 30 minutes. Roll it out with a little flour to around 1/8 inch thick. Then transfer to tart pan. Pressing dough to the sides and stab the dough with a fork along the bottom. Put back in the refrigerator for another 30 minutes.

  3. Two options Cornmeal or Gluten Free Crust

    1. Cornmeal: Preheat oven to 350 degrees. Once you have waited 30 minutes, take the tart pan out of the fridge and place tart pan on baking sheet. Bake till golden brown, make sure to watch the bottom of the tart, sometimes it puffs up (press it down if it puffs up). It should bake around 25 minutes. Remove from oven and let cool.

    2. Gluten Free: Preheat the oven to 400 degrees. Once you have waited 30 minutes, take the tart pan out of the fridge and place tart pan on baking sheet. Bake for 20-30 minutes until the edges are starting to golden. Remove from oven and let cool. 

  4. Filling: Wait to do this until right before serving. Remove the cream/lavender from the fridge and use a mesh strainer to separate the lavender from the cream into a mixing bowl. Once sifted you should have lavender infused cream. Add sugar, and vanilla bean seeds to cream. Mix on medium till peaks start to appear. Pour onto cool tart crust, spread evenly. Top with berries and sprinkle a pinch or two dried lavender on top and serve.

Variations: If you choose to use small tart tins, decrease the time for baking the tart shells significantly! They should only take about 10-15 minutes max to bake. Keep an eye on them and never leave the kitchen while baking tart shells. 

Enjoy!

Magically Delicious Pie

DSC00280.jpg

As children, we spent part of our summer vacations on Lake Erie in Ohio visiting our Grandma C and many aunts uncles and cousins. Those weeks were the highlight of summer, spending the hot and humid days swimming in the lake, walking down the street to buy candy at the corner shop, and convincing the adults to drive us to our favorite drive-in restaurant, White Turkey, AT LEAST once a day. Another perk of being at Grandma's was that she always had sugary sweet cereals and treats in her house during our visits. All the cousins would come down stairs each morning and pour a bowl of their favorite cereal and plan the adventures to be had that day. Our personal favorite was a big bowl of Lucky Charms (We affectionately called them Monkey Germs lol). This pie is a frozen take on our beloved cereal. This recipe transports us back to Grandmas house by the lake. We can almost feel the warm breeze drifting off the lakeshore and hear the distant rumble of a coming thunderstorm. 

xxx Ivy & Eve

Adapted from The Slow Roasted Italian.

Makes one pie with 12 small slices.

Ingredients:

  • 1 box Lucky Charms Cereal

  • 8 tablespoons melted butter

  • One 7 oz. jar of marshmallow fluff (about 1 1/2 cups)

  • 8 oz. cream cheese, softened

  • 2 cups heavy cream

  • 1/4 cup powdered sugar

Directions:

  1. Preheat the oven to 400 degrees. 

  2. Separate the cereal and the marshmallows into two separate bowls.

  3. Melt the butter in a small bowl.

  4. Add 4 cups of the cereal to the bowl of a food processor. Pulse until your mixture is crumbs. Pour in the melted butter and pulse until all the crumbs are moistened.

  5. Pour the crumbs into a 9 inch pie pan and press mixture on the bottom and around the sides to form the pie crust.

  6. Place the crust in the oven and bake for 5-7 minutes until it is slightly golden. Then place the crust in the freezer to cool while you prepare the filling.

  7.  Whip the heavy cream with a mixer until you can starts to thicken and then add powdered sugar. Whip until stiff peaks form. Place the whipped cream in the refrigerator while you make the other mixture.

  8. Beat the cream cheese and marshmallow fluff with an electric mixer until light and fluffy (about 5 minutes). Fold in 1/2 of the whipped cream and a 1/2 cup of the Lucky Charms marshmallows. Pour the mix into the chilled pie crust and smooth with a spatula. Pour remaining whipped cream over top and sprinkle the remaining marshmallows around the edge of the pie. Freeze for at least 3 hours. When it is time to serve, take it out of the freezer and let soften for 10 minutes.

  9. Slice and serve! 

Lavender Vanilla Bean Ice Cream

Lavender is one of our favorite flowers. We love the way it looks, we love how it smells, and we LOVE to eat anything with lavender. As kids, one of our favorite restaurants, Corkscrew Cafe in Carmel Valley, used to serve up the most delicious lavender ice cream for dessert. It was eventually taken off the menu (if you hear us, PLEASE bring it back!), but we never forgot the deliciously floral flavor of this dessert. Lavender is in full bloom in Carmel Valley right now, so we were reminded of our long lost favorite dessert and decided to try to make it ourselves! If we do say so, we think this even more delicious than the original. We added vanilla bean to complement the lavender, and we believe it is just perfect! The ice cream base is adapted from Jeni's Splendid Ice Cream recipe book. Eve went to undergrad in Ohio, where she first tasted flavors like roasted strawberry buttermilk and goat cheese and cherry ice cream. Jeni's ice cream base is unbelievably creamy. You won't be able to eat just one scoop!

xxx Ivy & Eve

We use the Cuisinart Classic Ice Cream Maker for our ice cream adventures. The machine is super easy, and there is no need for ice and salt like the old machines!

Makes one quart of ice cream.

Ingredients 

  • 2 cups whole milk

  • 1 tbsp plus 1 tsp cornstarch

  • 3 tbsp cream cheese, softened

  • 1/8 tsp fine sea salt

  • 1 1/4 cups heavy cream

  • 2/3 cup sugar

  • 2 tbsp light corn syrup

  • 1/2 vanilla bean

  • 2 heaping tbsp culinary lavender

Directions

  1. Combine 1 3/4 cup milk (minus 2 tbsp), 2/3 cup cream, 2 tbsp lavender, and 1/2 vanilla bean sliced open, into a saucepan. Bring to a boil over medium-high heat. remove from heat and let the mixture steep until the desired flavor. (you can steep the lavender in a cheesecloth or strain after this step if you want a smoother texture. We like the lavender left in)

  2. While waiting, mix the remaining 2 tablespoons milk with the cornstarch in a small bowl to make a smooth slurry.

  3. Then whisk the cream cheese and salt into the slurry until smooth.

  4. Fill a large bowl with ice water.

  5. Combine the lavender vanilla bean milk mixture with sugar and corn syrup in a 4-quart saucepan and bring it to a boil again for 4 minutes. Remove from the heat and gradually whisk in the cornstarch/cream cheese slurry. Bring the mixture back to a boil over medium-high heat and cook, stirring with a heatproof spatula, until slightly thickened, about 1 minute. Remove from the heat.

  6. Pour the mixture into a 1-gallon resealable plastic freezer bag and submerge the sealed bag in the ice bath. Let stand, adding more ice as necessary, until cold, about 30 minutes.

  7. Pour the ice cream base into the ice cream machine canister and process according to your ice cream maker's directions.

  8. Pack the ice cream into a storage container. Place the ice cream in the freezer until firm, at least 4 hours.

  9. Bon AppΓ©tit!

Raspberries Romanoff

Ever since we can remember, our Dad has been whipping up Raspberries Romanoff for dessert. We loved it when our Dad made this because it looked and sounded so fancy! Now that we are older, we are surprised how easy it is to make this delicious dessert!

xxx Ivy & Eve 

Serves two. 

Ingredients

  • 1/2 cup whipping cream

  • 1/2 cup (about 3 scoops) vanilla ice cream

  • 1 six-ounce carton of Raspberries

  • 1 tablespoon powdered sugar

  • 1 tablespoon Grand Marnier 

Directions

  1. Chill a mixing bowl in the freezer for at least 10 minutes. 

  2. Pour whipping cream into the chilled bowl and mix on high until it begins to thicken. 

  3. Add the sugar and mix till the cream starts creating peaks. 

  4. Gradually add the ice cream in small scoops. Mix until the ice cream is incorporated but still has chunks of ice cream (you want a bit of texture to your topping). 

  5. Finally, add the Grand Marnier and fold into the mixture. 

  6. Place half the raspberries into two serving glasses and the whipped topping on top. 

  7. Add a few raspberries and mint on top for garnish. 

  8. Enjoy!

TIP: If you like your dessert to have a bit more kick, add some more Grand Marnier! You can also mix it up and try it with strawberries, blueberries, or blackberries! 


Chocolate Covered Strawberries for Mother's Day & Free Printable Card!

With Mother's Day just around the corner, Eve and I were toying with ideas of what to give our Mom this year. After some time thinking, we decided we would make her chocolate-covered strawberries. We always buy these yummy morsels when we spot them in cafes and chocolate shops but had never really attempted to make any ourselves. It was SO simple, not to mention affordable! We recommend pairing these with a bottle of bubbly, naturally. We also designed a cute card to go with them for your Mom, because she really is the sweetest! Download the full-size card (we made a mini one to fit better in the pictures) for FREE by subscribing HERE! If you already subscribe, don't worry. We will be sending it to you shortly. Cheers to all our sweet Mothers! 

xxx Ivy & Eve

Ingredients & Supplies

  • High-quality white & dark melting chocolate 

  • Strawberries

  • Sprinkles, Nuts, and anything you want to top them with (optional)

  • Baking sheet

  • Parchment paper

 Directions

  1. Place melting chocolate in a microwave-safe bowl (you can also melt on the stove if you have more time).

  2. Set the microwave to 30-second increments and stir until just melted.

  3. Place parchment paper on baking sheet

  4. Simply dip the strawberry in chocolate

  5. Top with sprinkles or whatever your heart desires

  6. Let cool and set in the refrigerator before serving (they are best eaten the day of or next day).

Your Mom will LOVE them, we promise!